December 20, 2021

New AD1865NK DAC Board & Rebuilt My Amplifier

This might be my last post in this year. Personally I felt that this year is the most exciting for me, not because of the pandemic, but the working from home condition that makes me more productive. I can use my time which previously spent communiting on the road, from home to office, vice versa, now with more flexible time, I can make some great audio project.

This year my blog is full of DAC's project. I think I had enough great time for that. Then the rest of the day in this year, I just need to enjoy what I've made.

Before I closing this year, I want to upgrade my integrated amplifier. As you probably already know that I am loyal to LM3886 Gainclone amplifier. I love the simplicity audio system that consist of one box integrated amplifier + DAC, a pairs of speaker and a simple WAV player.

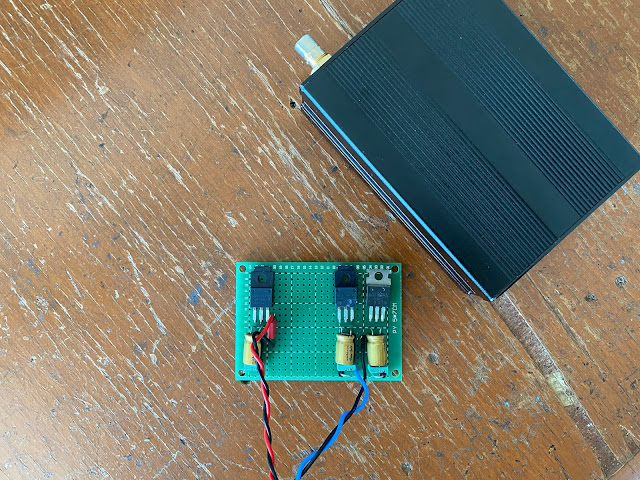
Then I remember that I have one thing to do with this amplifier, which has planned long time ago, is to replace the speakers binding post.

Recently I got this original CMC binding post in used condition. I really want to replace what I am using right now is no brand Taiwan made binding post. So here I am:)


December 13, 2021

The Ultimate DAC Built With Over-sampling AD1865

My best effort when building DAC is when I'm using the TDA1541A in non oversampling, fully independent voltage regulator on every voltage pins, and separate transformer for analog and digital circuit. I called this ultimate DAC built on here and here. I amazed on how great the result from optimized power supply to the sound quality compares to the minimalist approach So I named this built is the first ultimate DAC.

Lately I am in love with the sound of the another ultimate DAC + headphone amplifier using the oversampling AD1865 DAC. It is theoretically better in specification and also great sound quality result as well. It is a smooth sounding DAC, great details, great depth and great stereo separation. You can also check this another ultimate DAC built on my previous post in November 2021.

Since I still have the parts that I need to make another one, so I think I will replacing the DAC board on the first ultimate DAC to this new build oversampling AD1865 DAC. Of course with some improvements.


December 6, 2021

Vintage Multibit R2R DAC Tier List

At the very beginning of this year, I committed to explore the best multi-bit R2R DAC. This is simply because I have plenty of the resources (from broken old unit CD player of course) and ability to build them up. If you think this kind a recycle from old un-used unit to become something useful, than I should stated myself giving contribute for greener world:)

After all DAC that I built in this year, I think it is better for me to list them up again in one single page like this. Then I will rank them up in a simple tier list. The reason for this, so you all know what my opinion about of those vintage multibit R2R DAC especially in the sound quality.

November 26, 2021

Another Ultimate DAC Build (Part 5) AD1865NK

Yes, it is been awhile since I finished my another ultimate DAC using AD1865 with CXD1144 Sony over-sampling IC. I made this DAC including a simple headphone amplifier in one box, just for make this unit more functional. I will consider to add another line output and the selector switch just to give an option if this DAC want to connect to other audio system or just like this, using the headphone out.

But for now, I am quite often listen through my headphone with this DAC, so I will let this unit just like this for a while.

This AD1865 DAC has been reviewed by my friend. I leave it for a week at his house so he can evaluate the sound quality deeply. He is using Arcam TDA1541 S1 CD player modify to a DAC. He is also using Rotel CD player as transport, Camelot External Digital Filter and I am not sure about the power amplifier and the speakers he use. Please continue reading.


November 18, 2021

Another Ultimate DAC Build (Part 4) Assembly DAC AD1865

With the schematic provided from my previous post part 1 part 2 part 3 and of course I already have the main components on my hands, then I can start to design and build this another ultimate DAC.

The starting point for building a DAC is determined what box will be using. This would become the appearance of the finished project. I always using high quality aluminum box enclosure and it is not cheap. Preferable black color anodized for a great looking finish. Then, because the box comes in many shapes and size, this is also the reason why I don't like using commercial PCB available. The reason for this, because the PCB design which in most cases will not suitable to the box I preferred. Other than that, it is others people design and schematic, not authentic personal build. But that just my personal opinion. Let's continue.


November 16, 2021

Another Ultimate DAC Build (Part 3) AD1865 DAC

I have explained before on how to connecting the SPDIF input to the digital receiver and then goes to the digital filter. The IC that I use are YM3623 and CXD1144 here and here. You might wondering what would be my candidate DAC IC for this another ultimate DAC build, and here it is, the AD1865 DAC from Analog Device. The reason for this is because I still have several AD1865 in my bin. Other than that, especially for the sound quality, in my opinion AD1865 is sound great. It is R2R DAC and very simple to build compares to more complicated and rare PCM63 or AD1862.


November 12, 2021

Another Ultimate DAC Build (Part 2) CXD1144 Digital Filter

In this part 2, I will focusing on how to connect from the digital receiver IC to the digital filter IC. This part 2 is continuing from the Part 1 which explained how to convert from SPDIF CMOS to TTL digital format required by the YM3623.

At the glance, you might wondering why I prefer the over-sampling instead just a simple non-oversampling glue-logic? And this where the fun begin. The fun why I am refuse the dogma that always told you for the non-oversampling is the best sound quality compares to the oversampling.

Theoretically the oversampling is required to smoothing the ladder steps on the frequency band created by the digital domain. Ok, I a not going to much technical, but this oversampling is required for the smoother overall audio frequency response. The oversampling also reducing the complexity in the low-pass filter at the analog section. The result for this oversampling is better audio performance in all audio frequency band.


November 4, 2021

Another Ultimate DAC Build (Part 1) YM3623 Digital Receiver

In this post I will share my another DAC build that I think it could be my next ultimate DAC.

You probably know my first ultimate DAC built here is the non-oversampling TDA1541A DAC that built to emphasis on better overall layout, better components and better power supply design. It sound great by the way. Then, all my next DAC built is always having the same principal as that Ultimate DAC built in mind.

Today DAC build is another story. This is started when I'm read so many discussion on the most popular DIY audio forum on internet about building a DAC with mostly all in the same guideline. Great DAC should this and should that said the "experienced" forum members. This makes me restless. It is seems there is a strict line guides created by the members on how to make a great DAC. On the other hands, they killing the creativity. Like this example, why the non-over-sampling DAC will be sound more natural and better? If so the over-sampling would be sound worse? Why the IV stages should be using as simple as a resistor per channel and avoid the op-amps? Is the op-amps really that bad?

And so on, and so on.

That is why, this ultimate DAC build will emphasis on what everyone (mostly) on the internet avoiding at, but what I personally think it is better, theoretically. Please read on.


October 20, 2021

DIY PCM63 DAC Using The Kinergetics Research KCD-55 Ultra Chassis

If you have a chance to get the ancient Ultra Analog DAC module, you probably one of the luckiest audiophile. This is because the module it self is not for retail sale and the complete DAC unit using this Ultra Analog DAC module is also rare. The complete Ultra Analog DAC module can be found like in this Kinergetics Research KCD-55 Ultra. Few others like Sonic Frontier SFD-2 DAC also using this module as well but they are all hi-end DAC and high price.

Others than that, the Ultra Analog DAC module is said to be the weakest part. It is easily broken and cannot be repair just like a solid state IC. The closest sound quality is the PCM63.

Despite in this condition, I still like the appearance of this Kinergetics Research DAC chassis. I will using this casing to build a new DAC. This new DAC quality should be marvelous, at least the sound from the DAC in this box should be great, just like the Kinergetic Research DAC itself.

So here I am, start to build a DAC using the PCM63, known as the best vintage multi bit DAC IC.


October 14, 2021

Kinergetics Research KCD-55 Ultra DAC Components Review

No one talk about this great product from Kinergetics Research anymore. In fact this is one of best audio product in early 90's. The Kinergetics Research itself have full line up audio system from CD player, DAC, pre-amplifier and power amplifier but not so much variant from each products. It is a reputable company indeed, sadly their name vanished no where.

Especially in this post, I just bought used, not working condition Kinergetics Research KCD-55 Ultra DAC. The Ultra means this DAC using dual DAC module from Ultra Analog, a company that specialize in making one and the best DAC module use by many hi-end audio manufactures. This KCD-55 DAC only have 2 variant in the same casing. This is also the only DAC they have ever produced. The Kinergetics KCD-55 non-Ultra using quad AD1860 DAC. Because the input of both DAC section are the same, so they shared exactly the same chassis and PCB inside. So let's take a look.


October 8, 2021

Gainclone Integrated Amplifier With AD1865 DAC

This is my activity updates before the weekend comes.

Previously I talked so much about this Gainclone amplifier which is actually an integrated amplifier using the PCM56 DAC in one chassis. Then, I will replace the DAC module with this new AD1865 DAC module. This AD1865N simply a far better sounding DAC compare to PCM56P-K. So let's continue this project.


October 5, 2021

Single AC To Dual DC Rectifier Power Supply Ripple Rejection Improvement

I did many trial on this PCM56 DAC. This DAC is become my experimental tool for the next better DAC projects. If you not yet following my post before, so please visit the building process and the upgrades of my PCM56 DAC in here here here.

In this post, I will make another experiment. Previously, the power supply in this PCM56 DAC is intended to using batteries. This is before changed to single AC input power supply that I think will be more simple to use. This single AC is convert to half-wave dual DC power supply here. But the problem is this DAC unit still using small capacitors that calculated when using the batteries. The capacitors are only 100uF on each rail voltage and for sure not sufficient to reduce the ripple on rough half-wave rectifier conversion.

So in this post, I will replacing the small capacitors with the bigger one to improve the ripple rejection.


October 1, 2021

DIY AD1865 Non-oversampling DAC

I have built several top tier vintage multibit DAC with a great result and now I become addicted to experimenting the sound characteristic on other DAC IC. I will comparing them with what I have right now.

The fun fact about this vintage DAC are:

1. They are all great sounding and musical DAC compares to today delta sigma DAC.

2. The power supply need to have more attention and this direct result to the sound quality.

3. Who said that DAC IC will not give any difference?

Especially on point 3, that statement for sure comes from either a sales man of delta sigma DAC or un-experienced DAC builder, period.

I found that different type DAC IC have their own sound signature, even with exactly same analog stages and power supply. This fact makes me so curious and keep moving to another multibit DAC journey.

Today DAC project is using AD1865N which is very popular because Audio Note manufacture using the same DAC IC on their top tier DAC products. So let's build it!


September 19, 2021

Sharing The Components For The Next DAC Project

As usual on this Sunday morning, I starting my day with simple exercise. I notice the sky are very clear with unusual cloud pattern, so I grab my phone and take a shoot. Then I think this photo will be suitable for this post cover.

Actually I already had some components to share. It is for the next DAC project and let's take a look.


September 16, 2021

The Making Of Ultimate TDA1541 DAC (Part 2)

It is my dream to build the Ultimate DAC like this. This build will be based on my experienced, especially for all components, design and arrangement that contribute to the superior sound quality. The candidate DAC IC in this build is TDA1541A. This is one of the best sounding vintage DAC IC when it is implement correctly. I really love the mid range presentation with this DAC so much. It is multi layer, three-dimensional and detail mid-range presentation. The overall frequency response also have an outstanding performance. This is including great timing and attack in bass, large sound-stage, and nice smooth treble.

You probably have seen my previous post about the finished project of this Ultimate TDA1541A DAC but you probably not sure what makes this "Ultimate"? So in this post I will share the photos of the building of this DAC.


September 10, 2021

The Making Of Ultimate TDA1541 DAC (Part 1)

Looking back from early this year, I made several well known and reputable multi bit DAC in the small size. From the portable size DAC PCM56P here and DAC PCM56P for integrated amplifier here. Then I also made the portable size USB DAC + headphone amplifier TDA1541A here. I like to made one complex circuit small. This is also testing my skill when built them. They are working well but this small and portable size DAC have to cutting some corner to fit all in. And those cutting really effect to the sound quality.

Then I also made very optimal implementation of TDA1541A USB DAC here. This optimal version is focus on the power supply circuit, the component matching and very rigid chassis. Those are the recipe for the best sounding DAC. The drawback for all of this is the bigger size casing and of course, it sound far better than the small one.

The idea for making this ultimate implantation of TDA1541A DAC comes far before I made my latest DAC based on AD1862 here. I want the DAC that push harder in the implementation with almost cost no object. So in this post, I will share this Ultimate TDA1541A DAC built.


September 4, 2021

DIY AD1862 DAC (With The Schematic)

With the great result from my previous DAC built here I could say that the journey for the best multi bit DAC is over. The sound quality from TDA1541A S1 is remarkable especially on the mid range. What could I asking for more? But one day, my friend asking if I could check the others best R2R DAC.

It is the AD1862.

I replied, is it AD1865 you said? No, it is really the AD1862, not AD1865. It is technically better than AD1865. So I will make another DAC with this AD1862 since I already have this DAC IC a few days later. Lucky me:)


September 2, 2021

The "K" Grade PCM56 DAC Upgrade

Continue from the previous post about PCM56P-J here, I should admit that chasing the highest grade for this DAC IC is just like playing a fun game. Early disclaimer for this grading is actually made and measured by the Burr-brown manufacture to differentiate the measurement result after the IC's come out from the production lines. The closest to the best THD specification will be stamped by "K", the lesser THD number will be the "J" stamped and the last is no grade. Fun fact about this THD number can also be optimized, depends on the application use. Other than that, as stated in the datasheet, most of this R2R DAC IC's made by Burr-brown can be do the MSB adjust, so the THD number can be much better after this adjustment.

So, what this grades marking are for? Is it only for marketing purpose? Well, short answer it is not. Without or with MSB adjust, the final THD number can be better if the original IC having advantage from the lowest THD number. Other than that, the reason for this grading is because the MSB adjust taking another process in audio manufacture which require more time and measurement. So out of the box, Burr-brown R2R DAC IC using grades to determined THD performance without any MSB adjust. This is become more easy for the audio manufacture put their product based on the specification requirement.


August 26, 2021

DAC Power Supply Improvement In My Gainclone Integrated Amplifier

One reason to use the integrated amplifier is the simplicity. You might like the multi box components audio system which each of them having their own specific job. It spectacular for eyes and of course to the sound quality as well. I've seen one huge system that have more than 9 box and it is only using a CD transport as a source. This kind of system does not always practical in the real world. Mostly in common house situation, like mine. I can built separate box for my audio equipment, but I prefer an integrated system. It is sleek and simple. It also nice to see and wallet friendly:)

So I continue my post here about adding DAC PCM56 module inside the Gainclone LM3886 integrated amplifier. It is sound great and this amplifier already become my main audio system for many years ago.

But there always room to improve it. So in this post I will adding a separate transformer to supply the power directly to the DAC module instead previously taken from the LM3886 power supply.


August 22, 2021

The “J” Grade PCM56 DAC Upgrade

It is been a while since I using PCM56 DAC here and here, or inside my integrated amplifier Gainclone LM3886 using the same DAC here. I know this PCM56 is not the best DAC IC I have ever built before, let's say the TDA1541A USB DAC here is outperform in many ways. But this PCM56P suit my listening pleasure and this is the reason I still keep it.

Using PCM56 DAC is like having a nostalgic sound for me. My first CD player that I bought with my own money is this second hand Victor XLV-90 here. This CD player sound quality is outstanding because it using the vintage R2R DAC PCM53. It has similar sound characteristic like this PCM56 DAC.

Back to this PCM56P DAC, right now I got the better specification is the PCM56P-J. This "J" grade have better error tolerance compares to the non grading PCM56. As per PCM56 datasheet, the "J" grade specification has better in the THD, from -82 dB to -88 dB. Quite significant in the number I guess, but how is the sound difference?


August 10, 2021

DIY TDA1541 USB DAC (Part 4) Objective Sound Quality Review

You might already read my post about DIY USB DAC using TDA1541A S1 here. It is a journey to find the best possible sound from this old mighty TDA1541A DAC IC. Although the whole post of this built are only come in 2 post, but actually behind the scene, it is far longer than that. Those are from searching the components, make the components selection for the best at specific design, designing the schematic and all of it is tiring but at the same time is fun.

The analog section is the circuit that I changed most. From using FET and end up by using op-amp. This USB DAC result is great and the sound quality is outstanding.

Actually this USB DAC is built for my friend. I did test the sound quality for at least few days before I hand over to my friend. This USB DAC is far better and more resolving in every ways. This is the best sounding USB DAC I've ever built and the Nakamichi DAC-101 here cannot stand any chance to win.

Just like a chef who cook a meal, the chef cannot become an objective judge. It is simply the chef know what ingredients he put in it. My friend also cannot become a fair judge, because he also following this built closely. So, to make this review objective enough, let me introduce Mr.J to review this USB DAC as objective as possible.


August 5, 2021

DIY TDA1541 USB DAC (Part 3) With Op-amps Analog Output

This post is the upgrade from previous DAC built here. This is a desktop USB DAC with PCM2706 USB to I2S in the non-oversampling TDA1541A DAC.

Then the story to find the best analog stages is begin.

I have read Lukas Fikus explanation on his websites about how well the sound of TDA1541 DAC using single FET at the analog stages. This method is so simple and who doesn't resist to built one? He said the sound is like using a vacuum tube but with only simple schematic. He also comparing his FET design to more complicated HDAM Marantz. But when I applied those schematic like on previous post, there is no way the sound could be good.

The BF245A gate input is so low even the normal current output from the IC TDA1541A DAC could easily distorted the sound. The original schematic from Lukas cannot be applied and some modification needed to makes the distortion lower. The draw back is the analog output level even smaller. I cannot evaluate the sound quality so much because of the distortion flaw and unreliable design. What I heard from it is so much 2nd harmonic distortion.

But the journey for single stages analog output doesn't stop here. I continue to test the others design.


August 2, 2021

DIY TDA1541A USB DAC (Part 2) The S1 Single Crown Review

The latest TDA1541A USB DAC built here is not reliable. I put an early disclaimer to not follow that built yet. The DAC is works by using one FET BF245A per channel. This is to amplify the V out from the passive resistor at the DAC output. But it seems doesn't have enough juice to crank up the output level, thus the sound quality is not as good as my expectation.

I have another idea to improve this TDA1541A USB DAC. This will be cover on the next post. But today concern is more about the proof of authenticity of my TDA1541A IC. Then I will also compares to the higher version of this TDA1541A is the S1 single crown.

Let's this story begin.


July 22, 2021

DIY TDA1541A USB DAC (Part 1) With JFET Output

Building TDA1541A DAC is very simple compare when I built the R2R PCM56P DAC here. This is because TDA1541A is a stereo DAC in single IC package. The input TDA1541A is I2S that can be pair easily with the popular PCM2706 USB to I2S module.

My previous portable size TDA1541A USB DAC & headphones amplifier here is successfully brings the music enjoyment in the small size. Of course there are some cutting corner especially in the regulator power supply section to make all components fit in that small casing.

This is my second built TDA1541A USB DAC, but right now it is the desktop size DAC. I have this nice and elegance thick aluminum casing for quite a long time but not sure what suitable project for it until this project come. So lets begin.


July 16, 2021

DIY Portable Size TDA1541A USB DAC (Part 2) Thermal Improvement

This is the second part about DIY portable size USB DAC TDA1541A including headphones amplifier. The first part can be find here

I successfully built a miniature, portable size USB DAC using a TDA1541A. I think it is the first TDA1541A DAC built in this small casing ever. But after all, it is still a desktop DAC headphones amplifier because it using the external power supply from the wall adaptor.

This design has a flaw. The heat from the regulator IC cannot dissipate efficiently. This is because no heatsink attached to them. This may cause the IC to fail and direct impact to the TDA1541A it self. So here is few solution I made to solve this heat issue.


July 14, 2021

DIY Portable Size TDA1541A USB DAC (Part 1)

This is the first part about DIY portable size USB DAC TDA1541A with the headphones amplifier included. The second part can be find here

I have many awesome DAC that I have collected from early this year. The latest built DAC that I listen so much is this PCM56P here as part of my home stereo integrated amplifier. I don't to add another one until my conversation with my friends started. He has brand new TDA1541A IC that willing to sell to me. So here let's the new DAC project begin.


July 8, 2021

What Apple Dolby Atmos Spatial Audio Does To Music?

Last month Apple just announce the Dolby Atmos - Spatial Audio support for the Apple Music apps. This is also include the uncompressed, lossless audio format. I think this announcement is special since previously Apple always stick to their compressed ACC audio files. Frankly speaking, this Apple lossless audio is coming quite late. Others online music streamer such as Spotify Premium and Tidal already put the hi-res audio in their music library few years ago. So Apple seems responding this issue with this new Spatial Audio support by Dolby Atmos as the answer for current audio streamer player availabe.

Dolby Atmos - Spatial Audio only works with Apple device with iOS 14 or above. In this review, I test it using my iPhone 11. This phone is my primary mobile device since last year and also become the big parts in this blog because I use it for taking the photo. I've ever said before, somewhere I forgotten, that Apple right now is only focusing on their camera quality rather than sound quality for music. I think the coming of this Dolby Atmos - Spatial Audio and Apple Lossless in Apple Music could be changed my opinion about this Apple device from now on.


July 4, 2021

TDA1543 DAC Review In 2021

It is a fine day and as usual I am reading and searching online contents related to almost anything I like. During my search, I stop to the few online forum discuss about a simple DAC using TDA1543 DAC IC. The discussion about this DAC was about 3 years ago, and the latest was about a year ago. Quite new and overall discussion about this DAC sound quality mostly are positive. It is interesting topic anyway especially I was built this TDA1543 DAC long time ago in 2016. At that time, I combine this DAC with Tripath amplifier here and here before it sold in 2019. That is also my first DIY DAC and I am quite enjoyed this DAC so much, at that time.

The background story about this, previously I was using Sony Playstation SCPH-1002 as my reference CD Player. The reason I moved to this TDA1543 DAC is because the CD optic inside the Playstation is wear out and I cannot find the replacement for it. I pretty remember the sound quality of this TDA1543 DAC is quite comparable to Sony Playstation especially in the smooth mid range presentation.

So here it is in 2021, the new test of TDA1543 DAC.


July 1, 2021

DIY Fiio M5 Digital SPDIF Coaxial Output Cable

I was looking a portable player to replace my LG DVD player here as my current CD transport. The reason for this is I want more simple audio system. As you may know that my LG DVD player has digital SPDIF output. This SPDIF is Sony Philips Digital Interface, the standardized in digital audio format from the early digital audio system. This output is connected to the external DAC for the better sound quality.

I was looking portable player that support this digital SPDIF output but it is not an easy task since all input output connection for digital has been shift to the USB connection. The USB is actually a better improvement for multi purpose function, but for audio purpose, I still believe that the SPDIF gives better sound. Other than that, all my DAC input is using SPDIF input. So, no way I want to switch to the USB either.

I was looking the used Fiio X series from the X1, X3 and X5. They are all support this digital SPDIF output but somehow the used price still above US$100. This is expensive for a portable player that more than 5 years old.

All new portable player already remove this digital SPDIF output until I find this Fiio M5.

Funny it marked COAX OUT instead of SPDIF output although the function is all the same.


June 24, 2021

DIY PCM56 DAC Integrated Gainclone Amplifier

This is my second build of PCM56 based DAC. The basic schematic of this DAC is very simple, you can check it here. It is non-oversampling DAC, means no any digital filter or over sampling on the digital signal.

Previously I also have few DAC that oversampling by the design such as Clarion DRX-9255 EXL using PCM1702 and Nakamichi DAC-101 using dual TDA1541A S1, they both sound great. Comparing to this non-oversampling PCM56 DAC, it has different sound signature. This PCM56 sound very analog, lifelike vocal and still maintain the dynamic presentation which I also like it so much.

So in this post I will make another PCM56 DAC. Same schematic but lots of improvement especially in the power supply section. I will put this DAC inside my Gainclone amplifier here and this will become an integrated amplifier.


June 19, 2021

DAC LPF Op-amps Comparison OPA1642 NE5532 LM4562

My multibit DAC built here and here sound wonderful.

Previously I did some changes especially in all technical aspect and evaluate the sound quality improvement from that changes. Like in this post, the DAC is dual PCM56P then using internal IV converter to the LPF section.

The LPF section in every DAC is very critical. The good calculated LPF can reveal the DAC sound potential because no digital glitch occurs on the analog output. The LPF is not only made by the combination of the resistors and capacitor network, but the op-amp become the major factor to the sound improvement.

So in this post, I will review some op-amp that more suitable in this DAC LPF section.


June 17, 2021

Simple Single Supply AC to Dual DC Supply For PCM56 DAC

My latest DAC built is based on PCM56P here. This DAC built is intended to become my experimental project about how good the simple non-oversampling R2R DAC would sounds like. The overall size of this DAC is only 10 cm x 7 cm, very compact in size, slightly bigger than the Chord Mojo here but this PCM56 is far better in sound quality because it is multibit R2R resistor ladder network compare to the simple delta sigma DAC like in Chord Mojo.

Right now I mostly listen the music from this DAC PCM56 in my home audio system. Sometimes I also using this DAC on my headphones setups. This PCM56 DAC is powered by the battery pack. This is naturally has more cleaner power supply compares when using the transformer. This will impact to the smoother sound quality.

But using the batteries is more hassle than using typical wall adapter. I should recharge the batteries when the voltage drop and this is very annoying especially when forget that but I want listen to the music right away.

So in this post, I will share how I change from the dual rail batteries power supply to single supply using typical AC wall adaptor.


June 11, 2021

Under The Radar (Part 4) Massdrop Hifiman HE-4XX Ortho-dynamic Headphone

This post is the final post about "under the radar" headphones that sound great.

But I make a drift. This post doesn't count because this Massdrop Hifiman HE-4XX is a recent headphone and quite popular. The reason why I choose this is because after 2 weeks try to finding the cheap vintage headphones that almost no body aware of, then come to my conclusion that the Yamaha HP-1 is a cheap and good vintage headphones for a desktop audio system only.

So to end this series, I wonder how newer ortho-dynamic headphone can compete with the vintage headphone. The newer technologies will absolutely more efficient and have better tolerance, but will it sound better?


June 8, 2021

Under The Radar (Part 3) Yamaha HP-1 Ortho-Dynamic Headphone

Continue from my previous review about the Yamaha HP-50A here it would be more fun to have the higher tier of Yamaha headphone for this comparison.

In today post, I have the Yamaha HP-1 which is well known for the top tier Yamaha headphones line up. I personally never had any experience with this kind of headphone. This Yamaha HP-1 is the vintage audiophile headphone and it using the Ortho-dynamic driver same as the previous headphone review.

So let's begin.


June 4, 2021

Under The Radar (Part 2) Stereo Re-cabling Yamaha HP-50A Ortho-dynamic Headphone

Last week I post the Beyerdynamic HP-100 here review and somehow I am not quite satisfy the overall result. The main reason for that is this headphone is very hard to drive, it is heavy and bulky. I think I never get along with any Beyerdynamic headphones anyway:)

So I move forward to something unpolished jewel headphones around year 70s to 80s. They are not as hype as today market, yet they are built for professional user. So I get this used but surprisingly like new headphone, the Yamaha HP-50 for only US$35. Very cheap in my opinion. But I cannot using this headphone out of the box because this HP-50A is mono version headphone. I need convert to stereo first by re-cabling this headphone.


May 30, 2021

Sunday Photos Show: The Bottlehead Crack Amplifier

I made this photo shoot on Sunday morning when I listening the music through my headphones along with the Bottlehead Crack and newly upgrade hybrid vacuum tube op-amps headphone amplifier here and here.

I actually find that this hybrid vacuum tube op-amps amplifier sound so good that can match with the big brother, is the Bottlehead Crack. With the total built cost for this hybrid vacuum tube op-amps amplifier is only one quarter cost of the Bottlehead Crack, I think it can be considerably a budget audiophile headphone amplifier.


May 27, 2021

Under The Radar (Part 1) Beyerdynamic DT-100 Dynamic Studio Headphone

From early this year, I have talk a lot about the multibit R2R DAC. This type of DAC give so much improvement in my audio system. I pretty happy with that, but I felt that I never talk about the headphones anymore. I often listen from my home stereo system and my headphones journey is somehow stop at the Sennheiser HD600 as my reference.

So I guess I make this post just for fun.

I will search again the headphones that under the radar for most people. The headphones that still available today, or maybe already discontinued, but for sure they should available in the used market. The headphones under my radar are should be affordable under US$150 and I wonder with this small money spent, will I get the treasure for good sounding headphones?

So, in this first post of the under the radar headphones review is goes to Beyerdynamic DT-100.


May 21, 2021

PCM56 R2R Non Oversampling DAC Built

From early this year, I am start to playing a lot with the multibit DAC.

They are from Sony CDP TDA1541A here, Nakamichi DAC-101 dual TDA1541S1 here, Clarion DRX-9255EXL PCM1702 here and Clarion HX-D1 PCM1704 here.

What I said playing with them is actually more suitable words because none of them are built by myself. I only study and exploring those unit then make some upgrade especially on the power supply components, signal capacitors upgrade, and bypassing the unused internal circuit for more clearer yet natural sound quality. This upgrade make a lot improvement compare to the first time I listen from it and I can really enjoy what the designer from each manufacture deliver the sound they would like to perform in those units.

Those said units are categorized as a parts of hi-end audio system and I really now familiar with the sound signature from each of them. But to be honest, I am not satisfy yet with this condition. Because none of them is built by myself from ground up. I don't feel like my own signature are on those unit. So, after searching the availability option for any R2R DAC IC out there, I stuck to this late 80's vintage DAC IC. This is the PCM56P.


May 12, 2021

Built Your Own Bluetooth Speaker For Pool Party At Home

I am quite reluctant to build such a mediocre audio system, such as the Bluetooth speakers system like in this post. I prefer buying a finished product like the Xiaomi Bluetooth Speaker that cost around US$20. I had it once very long time ago and it sound quite okay for a small speaker. At that time I did not use it quite often so I better sell it anyway.

Fast forward today, in my daily listening experience, I have good stereo audio system in my house and this system serve me very well. Listening the music with this audio system still a breath-taking experience for me.

Then, I am in a long holiday now, starting from this day to next week. And because we are still in this pandemic situation, so me and my family planning to create a small staycation at our house. I prepare mini pool for my kids, it is 3 meter by 2 meter balloon pool, while me and my wife will enjoying the nice afternoon with some bread and coffee.

So, for more rewarding experience, I need an outdoor Bluetooth speakers, connected to my Apple Music Player on my smartphone. Although the sound quality will not become the first priority, this Bluetooth speakers should capable to deliver the sound fuller and louder, but still enjoyable to hear.

To make it simple, the power source for this Bluetooth speaker could be using external 12 volt batteries or wall wart DC adaptor. It should be very efficient that it can play music all day long and the most important things when building this Bluetooth speaker should be cheap and simple.


May 7, 2021

Copper Vs. Aluminum Chassis Effect In The Audio Application

From many years ago, the audio industry has been using the copper material for the electronic enclosure. This said to be the best enclosure for the electronic inside and impacting to the audio quality.

The copper is the best conductive material, yet cheap enough if compares to the others exotics material such as silver or gold. Especially for the copper is the very best way to get minimum loss in voltage transfer through the long and wide surface area.

The problem with the copper material is not the cost of the material, but because the copper characteristic is corrode easily, then when using it for electronic chassis, the engineer has to deal with extra cost to protect and avoid this corrosion. This additional step makes the copper more shiny and elegant to look at, yet withstand for long period of time.

So in this post is not just about theory. I will witness the effect of the copper chassis compares to the previously using the aluminum chassis.

Stay reading.


April 30, 2021

Dual Op-amp Upgrade In The Hybrid Vacuum Tube Headphones Amplifier

Last year, I made this hybrid vacuum tube headphones amplifier project. The basic idea is based on the pictures on the internet that a headphone amplifier is using a vacuum tube with only 2 pieces of AA batteries. It is visually (from the internet photos) can drive the full size tube on it. I curious because there is no proven or any review about this vacuum tube amplifier in a working condition yet.

Then comes to the conclusion when I built one here, it simply doesn't works at all. The power from 2 AA batteries cannot heat the tube heater, thus increasing the voltage doesn't help it at all. Because it facing with power supply current issue, not the voltage issue.

I changed the layout by simply using 12 volt 2 ampere external switch mode power supply. Then the final layout is using Nichicon UKA as upgraded capacitors here and I also using the 3 batteries 18650 in series with total 12,6 volt 2.200 mAh here. It is now a working hybrid vacuum tube headphone amplifier.

For high efficient earphones, this amplifier can drive properly. My Sony MH-1C sometimes can sound wonderful with this amplifier but for more complex music that require more power to attack, this amplifier still feels lack of power to drive this earphone. The sound in a simple music when it drive the high sensitivity earphone, can sounds detail and wonderful.

So I guess I need to rework this vacuum tube amplifier again. The candy tin as the amplifier case previously is too small and cannot fit so much components in it. Especially for the buffer stage that using an op-amp for both channel also not deliver so much power to drive an earphones.


April 24, 2021

Obsolete DIY Audio (Part 2) First Watt B1 Buffer Preamplifier

I continue this topic about what certain do it yourself (DIY) audio that obsolete, means it used to be good but not for today standard.

The First Watt B1 Buffer preamplifier are published around 2008. It is very popular buffer preamplifier among DIY audio at that time and I am the one who also praised it very much. You might probably know the buffer function in audio system, in the First Watt article about this B1, it is explain the function completely by the audio guru, Mr. Nelson Pass. In short, this buffer function is for impedance matching between input and output, from the source to the amplifier.

I always said this is just like a preamplifier but without additional gain. I have made this B1 buffer 3 times in the past and they makes me smile. Mostly I combined this B1 buffer with the Gainclone amplifier. This makes the music more deeper in sound-stage and reveal the details.

For that reason, I will make it again right now.


April 16, 2021

Obsolete DIY Audio (Part 1) Tripath TA2024 Amplifier

Do it yourself or DIY for the audio equipment is a journey.

You get better experience over one project to another, either it is a good project or the fail one. This DIY audio is not cheap. I always say it to the new comers. I started this hobby when I am teenager, then it keep continues until now. This hobby right now is far easier than my past. Especially with so much information over the internet right now, all problems seems not a problem at all. If I summ all my tools and spare parts cost, they will be worth for moderate audio system.

So what related this intro to this post anyway? Well, in the past, I experience many audio project that give better result. Sometimes, I was wondering how they perform right now? So I will build it again to test in my current audio system.

Right now, I still wondering how good is the small class D amplifier. The famous one is Tripath  TA2024 amplifier that I have praised it very much in the past. This is a very efficient amplifier, running single supply, means can using battery which is really capable and reliable. The power output only about 6 watt per channel, but if pair with the moderate efficient speakers, it can sing very well.

That is my experience in the past and how is will perform right now? So I will make this Tripath TA2024 amplifier again, only to pay my curiosity.


April 9, 2021

Nakamichi DAC-101 (Part 6) Decoupling Capacitor Upgrade

I think this is the last post for Nakamichi DAC-101 components upgrade.

At this moment, this is the best sounding DAC for me, especially since my previous components upgrade. Those steps makes this DAC sound quality significantly better and it also improve the reliability of the unit.

But something across my mind about the decoupling capacitor on the TDA1541. This capacitors function are for the active divider inside the IC. Based on the datasheet recommendation, the capacitor value are 100nF each. There are 14 pieces for each TDA1541. Interestingly for most vintage hi-end CD player which using the same TDA1541 as the DAC, the capacitors value are more than 100nF up to 470nF.

So by looking inside this Nakamichi DAC-101, I will share the upgrading process of those decoupling capacitor using 470nF Wima MKS. Then I will find out how this upgrade improve the sound quality.


April 3, 2021

Nakamichi DAC-101 (Part 5) Op-amps & Capacitors Upgrade

The upgrade of this Nakamichi DAC-101 is continue. Previously, by using the external linear power supply to this DAC unit gives significant audio improvement.

The DAC IC alone is not the only factor that determined how good the DAC could perform, but what comes around to support the DAC really matters to reveal the true potential of the DAC itself.

I think the analog stages after the DAC contributing a lot for the better sound. This Nakamichi DAC-101 analog stages is divided by many section, but I will explain based on the schematic and where should I start to upgrade it.

Please continue reading.


March 27, 2021

Clarion HX-D1 Car Head Unit to Home Audio CD Player (Part 3)

My posting in this month is full of this Clarion HX-D1.

I made this quite in rush because it requested from my friend, who bought this unit for his temporary CD player replacement.

Almost 2 weeks has pass since the last modification which is previously, I take the line-out directly from the analog stages, the I/V and the LPF section. The new owner of this Clarion HX-D1 enjoy it very much and he requesting another modification.

After consulting with me again about what will be suitable for this final modification, then we are agree to by-passing the internal tone control and channel buffer in this unit while still using the internal volume control.


March 19, 2021

Clarion HX-D1 Car Head Unit To Home Audio CD Player (Part 2) Tone Control & Pre-amplifier Bypass

So today post is about doing some modification for the input output in this Clarion HX-D1.

As you might remember, I had the demanding customer who bought this unit and request it to make this unit more simple to use in the home audio. This modification process is quite easy because the only input would be the power DC replaced to the socket input from home power supply.

Then the output could be a line out via 3.5 mm socket. It is no other method simpler than this when modify the car audio source for home audio.


March 12, 2021

Clarion HX-D1 Car Head Unit To Home Audio CD Player (Part 1) Comparison With Clarion DRX-9255

On previous post, I have talked a lot about the Nakamichi DAC-101 for home audio. My interest to explore the multibit DAC is still continue. The PCM1704 is believe to be the last multibit DAC before all DAC replaced by delta sigma. This DAC can be found on Clarion HX-D1 which is the HDCD CD player using dual PCM1704U. This is the successor of the previous generation the Clarion DRX-9255. I really don't think the difference on them is just the DAC IC only.

So in this post, I will exploring the components inside while modify it to become a home CD player.


March 5, 2021

Nakamichi DAC-101 (Part 4) External Power Supply For Home Audio

In this part 2 of modification the Nakamichi DAC-101 will focusing on the power supply inside the DAC unit.

So in order to accept the new power lines from the external power supply as describes in the part 1, (which are DC +17 volt and DC -17 volt and center tap as the ground) to the existing power terminal on this DAC unit, I need to bypass the internal switching power supply then directly connect to the DAC power regulator. This will result to a clean looking DAC which I will love to see because it keep maintaining the original Nakamichi DAC chassis on my listening room.


February 24, 2021

Nakamichi DAC-101 (Part 3) External Power Supply For Home Audio

In this post,  I will making an external power supply for this Nakamichi DAC-101.

My goal in this modification is to have better linearity from the better power supply components. This new power supply will intended to use at home audio connect to the mains AC outlet.

From my previous post about this DAC unit, the internal 12 volt switching power supply in this unit was broken. I think this could become the common problem for every Nakamichi DAC-101 because of the poor switching power supply design. By using proper size transformer to supply to all DAC components inside this unit, it will improve the overall performance and reliability for sure.