With the schematic provided from my previous post part 1 part 2 part 3 and of course I already have the main components on my hands, then I can start to design and build this another ultimate DAC.
The starting point for building a DAC is determined what box will be using. This would become the appearance of the finished project. I always using high quality aluminum box enclosure and it is not cheap. Preferable black color anodized for a great looking finish. Then, because the box comes in many shapes and size, this is also the reason why I don't like using commercial PCB available. The reason for this, because the PCB design which in most cases will not suitable to the box I preferred. Other than that, it is others people design and schematic, not authentic personal build. But that just my personal opinion. Let's continue.

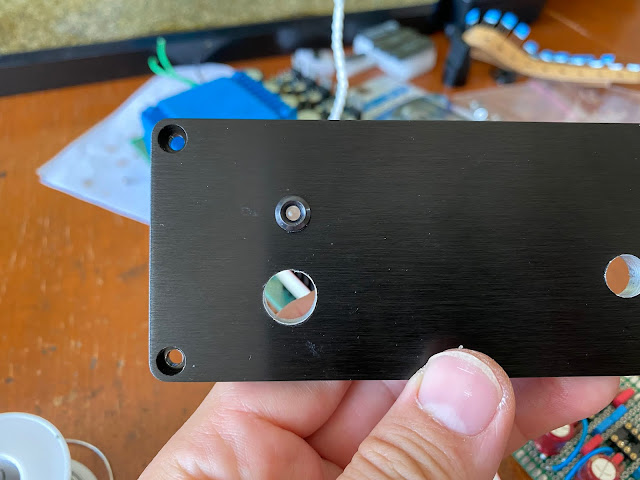
The size of this box is about 130 mm wide, 250 mm depth, and 55 mm tall. It is a compact desktop box. Not so big and not so small either, it is handy.
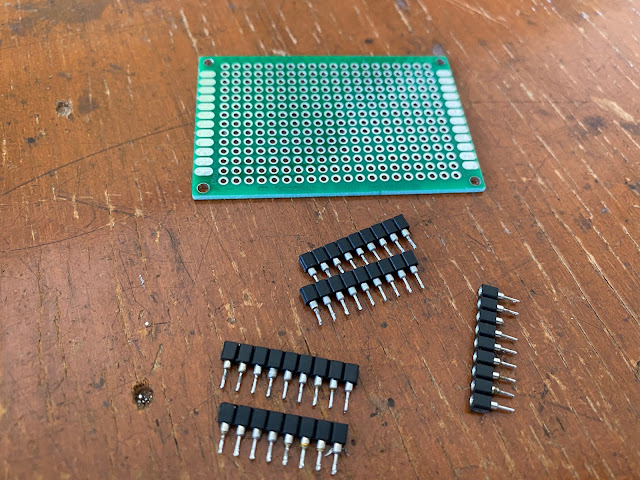
This is my starting point to cut the universal PCB and align with the slot inside the box.

The first things I build is the power supply section. As I always said, the quality of the power supply for DAC determined the sound quality of the DAC itself. Never stingy to spending more on high quality transformer, capacitors and regulators. They are one of the key components for any ultimate DAC build. In this build, I am using high quality transformer from Dantrafo Horsens.


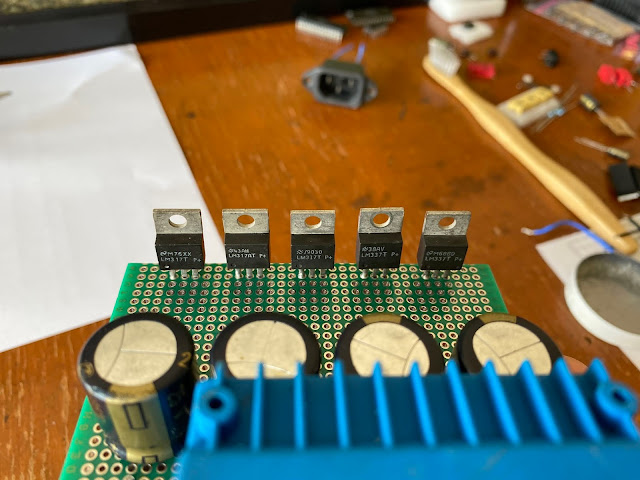

The power supply is test first before I continue to the DAC board.


Finished with the power supply, then I start to assembly the DAC components on the second board.


My initial concept is I want make a modular design on the analog stages and with pre-amplifier stages. This would be interesting because in the future I can design others type analog stages besides using op-amps as this first build. But it is changed because during the first DAC test, I found one regulator drawn too much current. The regulator mentioned is for the digital supply.


The digital filter CXD1144 drawn so much power, about 500 mW and need separate regulator for better performance. The overload regulator can caused an oscillation that can effect to the sound quality as well. And this is the additional regulator IC only to supply the CXD1144. The big heatsink taken place where the pre-amplifier module should be put in.


The PCB space for the modular pre-amplifier section is now taken by this additional regulator.
Then I changes the whole concept of this ultimate DAC build including the headphones amplifier. The reason for this in my opinion have more beneficial than the initial planning.
First, I can using this unit as a simple all in one desktop R2R DAC + headphone amplifier.
Second, I can just simply using a selector to choose between headphones out or line out taken before the volume potentiometer. This will be my near future work, but for now, I stick to the DAC + headphone amplifier first.
Third, the pre-amplifier mostly not necessary in the audio chain. Like myself, I prefer using a simple passive volume control compares to an active.


Back to the box, after the building concept is fixed, then I start to make a plan for this input output DAC. It is quite an easy job but need a precise measurement.

Then I working on the connection between power supply section to the DAC section.


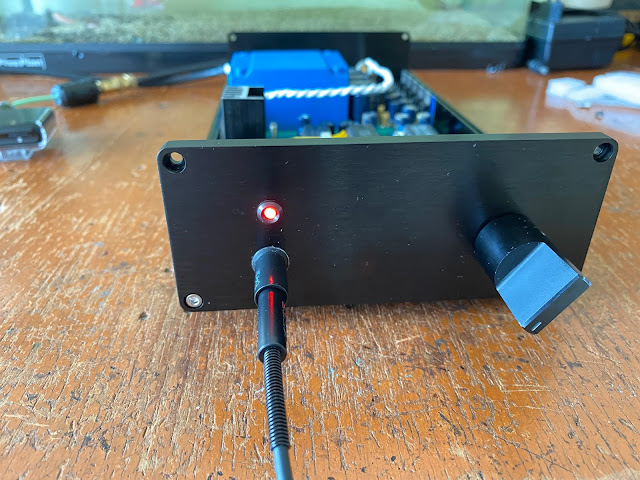
Technically this is all finished.
I almost forget to mention the headphones amplifier in this DAC is the Cmoy headphone amplifier design. It is simple to build and with respectively good sounding amplifier. Yes I know it is out of date design, but hey, it is simple to build with few parts and a 4560 op-amp. Remember that I will make a line out later on. So I can connect this DAC to other audio system. I will put the switch as the selector between headphones out or line out. Again, for now I really like how this DAC build looks!

Then I put all the IC's to the sockets, take my headphone and start the music.
It sound so wonderful:)


Disclaimer: Any statement and photos in this article are not allowed to copy or publish without written permission from the writer. Any injury or loss from following tips in this article is not under writer responsibility.
Another Ultimate DAC Build (Part 4) – Assembly DAC AD1865
ReplyDeleteWith the schematics from parts 1, 2, and 3, and all the main components ready, I began designing and building this ultimate DAC. The first step is choosing the enclosure, which defines the final appearance. I always prefer a high-quality aluminum box, preferably black anodized for a sleek finish. Commercial PCBs rarely fit my preferred box shape, so I use a custom universal PCB to ensure authenticity and a perfect fit.
The box measures 130 mm wide, 250 mm deep, and 55 mm tall—a compact desktop size.
I start with the power supply section, as it critically affects DAC sound quality. High-quality transformer, capacitors, and regulators are essential; in this build, I’m using a Dantrafo Horsens transformer. The power supply is tested before moving on to the DAC board, reflecting precision and care typical ofElectronics assembly Poland
projects.