December 29, 2022

Recap Of The Year 2022

It is almost at the edge of year 2022.

As usual, I always do a recap for what I did in this year.

In this 2022, there is not many DAC project like what I did in 2021. The pandemic is slowly vanished and life continue back to normal. I am now spending most of my time working at the office and just having a little time for this hobby.

The other reason it is simply because I already exploring almost all popular vintage multibit DAC in 2021.

But there are few project I 've done this year which they are always be different.

I always exploring the new idea especially when implementing the DAC I built. The GIC filter is one of the new things for me which the result is quite spectacular. The others is using the vacuum tube output for the PCM1704 non-oversampling DAC and 24 bit USB XMOS digital receiver. The DAC with this implementation brings very natural sound.

I take this post cover with my previous built, is the ultimate AD1865NK DAC which I just open up the cover again and see inside.


December 9, 2022

PCM63 DAC Build - My End Game DAC

To closing this year, I think I wanna fill it with the new project.

I will build another PCM63 DAC.

As you might ready my post here, I put this PCM63 DAC at my top tier list and this might be my last DAC built, my end game DAC.

Looking back since 2 years ago, I am more focus to build the vintage multibit DAC. This building process are become an addiction for me. The project are start from finding those rare vintage IC components, designing the whole circuit, point-to-point connection to the layout and decide the final appearance of the DAC unit itself. Those steps are very entertaining for me, not to count the sound quality result from all my DAC built are fantastic.

Same like this build, as you all know that none of my DAC are built the same. In this build is also should be different from what I previously built here

So let's continue.


November 8, 2022

Ultimate TDA1541A S1 USB DAC Updates

The last built of my TDA1541 USB DAC with GIC filter is working and sound great. This TDA1541 DAC is so simple to built and only required PCM2704 USB to I2S module board as the digital receiver.

You can check the built process here.

In this updates, I will show few upgrade. One of them is by replacing the TDA1541 with TDA1541A S1 single crown which have better specification.

I also put DC blocking capacitors at the output since I got the DC offset at the output naturally caused by the digital element matching from the TDA1541 itself.

Then, I repaint the chassis.

It look gorgeous.


November 1, 2022

The Ultimate R2R USB DAC PCM1704 With Vacuum Tubes Output (Part 4) Review

For me, this ultimate R2R USB DAC using PCM1704 and vacuum tube as the analog output is the most ambitious project that I wish to have, and I am glad that I had it right now.

Think about my previous DAC built are all using op-amps IC for the analog section. They are many variation of them and I just wondering how would the vacuum tubes sounds like when using in the analog stages of a DAC. What the difference between using all op-amps and passive IV with vacuum tubes at the analog part of a DAC?

This DAC built is the answer for all my curiosity.


October 13, 2022

The Ultimate R2R USB DAC PCM1704 With Vacuum Tubes Output (Part 3) Chassis & Assembly

On the previous parts, I have made separate PCB for each DAC and power supply modules. This method makes me easier to upgrade to a different module someday.

The total modules are 4 PCB which they are consist of:

1. The PCM1704 DAC with receiver and power supply regulators.

2. The high voltage transformer for the vacuum tubes.

3. The low voltage power supply and regulator circuit for the vacuum tubes.

4. And the last is the vacuum tubes analog module.

Continuing this ultimate DAC project, I need to put them altogether in one single chassis.

And here it is.


October 7, 2022

The Ultimate R2R USB DAC PCM1704 With Vacuum Tubes Output (Part 2) DAC & Analog Section

I continue my post about the building process of this ultimate USB DAC using PCM1704 and vacuum tube output.

I choose this PCM1704 as part of this ultimate DAC project is because this PCM1704 is the latest R2R multibit DAC and discontinued before year of 2000. This PCM1704 is the only off-shelf IC that capable of 24 bit and 96 kHz sampling rate.

For the analog section will consist of a vacuum tube per channel. It is 6DJ8 tube that very popular and easy to find the upgrade replacement.

So let's continue.


October 3, 2022

The Ultimate R2R USB DAC PCM1704 With Vacuum Tubes Output (Part 1) Power Supply Section

A short brief about my Ultimate DAC built since last year are all having the same principles. The first things, they are optimized in the power supply section, using the best components possible and the better layout. Then the second things, they are theoretically the best to implemented.

For sure, all of my DAC built are never the same. I keep experimenting different kind of digital receiver, DAC IC and analog section variation to aim the best sound from the multibit vintage DAC.

With all of my previous DAC built are using the solid-state output, means they are using op-amps as the IV conversion, LPF and buffer output, but I have one dream to make a DAC using the vacuum tubes output.

And I think this is the right time to make it happen.


September 23, 2022

The Reason Why I Still Prefer The Vintage Multibit DAC

The vintage multibit DAC is the oldest structure of digital to analog converter used since the early era of digital audio player. This multibit DAC can be built by using resistors ladder or the current converter. They are complex and expensive to built.

Later on comes the 1 bit delta sigma DAC from the Japan electronic manufacture tying to shift the domination of the multibit DAC IC that held by the western electronic manufacture.

In this post, I am trying to share why I still prefer using the vintage multibit DAC over the delta sigma DAC.

Keep reading.


September 3, 2022

Alpine DAC 3900 - The Ultra Rare Vintage Car Audio DAC

The story of this week is I just bought the Alpine DAC 3900 at the fair price. The overall condition for such this 30+ years old unit is in my opinion, excellent!

The Alpine car audio launch this DAC 3900 series along with the cassette/ control head unit and the CD changer 5959. Yes, at that time, CD is the king and this DAC 3900 is the components of the highest grade of Alpine car audio at that time.

So in this post, I am not just preview the outside of this DAC 3900 but also what inside it.

Please enjoy:)


August 26, 2022

A Simple DIY Amplifier Project For Cheap

The story of this amplifier built is came 2 month ago when my friend asked me if I could build small amplifier that sound good enough to drive his 2 way bookshelf speakers.

He just moved to the new house and the living room design is now more minimalist. Previously those bookshelf speakers are connected to the home audio receiver, so he can watching TV, playing games, and listen to the music with the same setups.

In the new house, that home receiver cannot fit to the new cabinet. He replaced it with only using a Yamaha sound bar. It is sound good for movies and playing games, but not for music. That is why, he contacting me to build a small affordable good sounding amplifier that can fit inside his new cabinet so He can still using the bookshelf speaker just to listen to the music only.

Since this build is simple, I think this is a good share for everyone who want to build an amplifier.


August 9, 2022

Direct Drive DSD Files Without Any DAC

It is quite some time that one forum on the internet was shocked with someone amplify a raw DSD digital signal without any DAC, and it works!

This issue also takes my curiosity and I want to try how could this possibly done.

I am searching more information and this is quite makes sense since the DSD file is basically a pulse density modulation and it is looks like an analog signal show on the oscilloscope. This is called data stream that very fast data generate and creating just like the analog signal.

It is completely different with common pulse code modulation or PCM in most music files, which they are basically codes that need to translate first before convert to the analog by using a DAC.

So in this post, I will try by myself this digital DSD files amplify directly to analog.


July 28, 2022

Simple Resistor For IV Converter AD1865 DAC

On my previous DAC built, the another ultimate DAC build here is basically an oversampling AD1865 DAC using CDX1144, then the current signal from DAC will going to the replaceable module called the IV & LPF combo module. This DAC is including a simple headphone amplifier that was initially built for experimenting various type of IV and LPF, then by using a headphone, I can carefully study how those modules effect to the sound quality.

But I never did it anyway:)

So I think, this is the first time I open it up again since the very first time built. Right now I will testing one simple method of DAC IV converter using only a resistor per channel.

I am really curious how the sound quality with it.


July 19, 2022

GIC LPF Schematic & TDA1541 USB DAC Updates

My first trial using the GIC LPF is on this TDA1541 USB DAC. The result is surprisingly amazing. You might check the post here for the detail review of this DAC.

I guess it is already few month passes since the built and this TDA1541 USB DAC is still "naked". Not even I think to put it inside a casing. I using this DAC in my test bench, to testing others audio components and I guess this is the time to find a casing for it.

First of all, I don't want fancy aluminum casing. They are expensive. So I take the unused steel box that, a little bit rusty. It is need some cleaning and painting, but at the end it is a nice casing compare if not using any casing at all.

Please continue read this post. At the end of this post, I will share the GIC LPF schematic that I implemented in this TDA1541 USB DAC.


July 4, 2022

Audeze LCD-2 Headphone Review

For years I was searching a better headphone that I can compete with my currently favorite headphone, is the Sennheiser HD600.

Then, it is happened once I got this Audeze LCD-2 headphone right now.

Other than that, I personally like the design of this headphone more than anything I had before. It is just like a classic headphone which I think Audeze is quite conservative with their headphone design anyway since all of them shared the same design languages.

So let's take a look closer.


June 16, 2022

Passive Preamplifier

A chain in one audio system is commonly consist of a source, pre-amplifier, power amplifier, and a pair of speakers.

Especially between the pre-amplifier and power amplifier, most owners demanding more simple setup like using only an integrated amplifier. This integrated amplifier is including variety of input selection and a volume control and a pre-amplifier circuit inside.

For the purest audiophile, the coloration from the pre-amplifier is avoided. That is why they prefer only using a power amplifier, minimizing extra components that can cause the coloration from it.

With this in mind, they are prefer to use a passive preamplifier to connect to the power amplifier.


June 3, 2022

Reisong A10 Single Ended Tube Vacuum Amplifier (Part 3) High Bias 6L6

In this part 3 of the Reisong A10 single ended vacuum tube amplifier, I will share the upgrade progress to make this amplifier sound better by replace all the vacuum tubes and increase the bias on them.

On the previous upgrade, I have changed this amplifier configuration from ultra-linear to triode. The triode is well known for better sound but has lower power output compare to the ultra-linear. This lower power output will become an issue if the speakers connected to this amplifier is having low sensitivity. But because this amplifier is intended to use for balanced headphone amplifier only, so the power output is not become my concern.

This amplifier is having so much potential, so keep reading for this final progress of this amplifier upgrade.


May 25, 2022

Reisong A10 Single Ended Vacuum Tube Amplifier (Part 2) Balanced Headphone Out Modification

Continue from the previous post about the introduction of this great affordable vacuum tube amplifier, so in this post, I will share my first modification to the layout of this amplifier.

This layout modification is quite radical, because I will put balanced headphone out via 4 pin XLR in this amplifier and defeat the speakers out. The reason for this is this amplifier dimension is small enough for the headphone amplifier compare if I am using the KT88 amplifier here.

We never see Reisong build amplifier for headphones, so I should make one with this unit.

Keep reading.


May 22, 2022

Reisong A10 Single Ended Vacuum Tube Amplifier (Part 1) Introduction

This Reisong A10 is a very popular vacuum tube amplifier. This is because the price is very cheap consider to it's high built quality.

I got one in this second hand condition for about US$250. The amplifier condition is like new.

In my opinion, it is a great small amplifier. It weight about 7 kilos and the casing is all stainless steel, beautifully mirror finished, and well arranged components inside out.

In this post, I will make a review about what this amplifier gives for the price.

I think, this could be the entry point for anyone who want to explore the excitement of do it yourself audio, especially for vacuum tube amplifier. So let's begin.


May 8, 2022

DIY Ultimate AD1865 DAC With GIC Filter

This is the second implementation of the GIC filter in the DAC circuit.

Previously I have using this GIC filter in the non-oversampling TDA1541 DAC and the result is smoother sound and micro detail reveal. The sound quality from this TDA1541 DAC is now extraordinary.

Then in this today post, I will do the same in my Ultimate AD1865 DAC that I've previously built  here. This DAC is oversampling using CXD1144 and the low pass filter using unity-gain Sallen-key LPF. Because this Ultimate AD1865 DAC built is intended for future upgrade, so the board inside are separate into 4 module. What I will do right now is built the new analog output module using the GIC filter and replace one of the board with this new module.


May 3, 2022

DIY TDA1541 USB DAC With GIC Filter

My previous post is the explanation about General Impedance Converter (GIC) filter which have been long forgotten. This could be, first it is because more complicated design compare to common low pass filter and second, the digital oversampling already took the job for smoothing the audible frequency range and it doesn't require too much filter slope at the output anymore.

But I really want to implement this GIC filter on my DAC built. I want to experience the result by my own. So in this post, I will make another DAC. This is the same TDA1541 non-oversampling DAC using PCM2706 as USB input to I2S converter. Then the analog output would be the GIC filter.

This build schematic will be the same just like my previous TDA1541 USB DAC here and here but at that time the analog is the unity gain Sallen-key filter and this new build will be using the GIC filter. They both will be compare directly.


April 23, 2022

General Impedance Converter GIC Low Pass Filter DAC

This post is about understanding the General Impedance Converter or in short the GIC filter. This is the type of audio filter that has been forgotten in few decades.

So here I am, back again to the DAC topic and will only focusing on the specific analog section.

I thought I will fully stop to make any DAC project but in fact it is hard for me to do it. Especially like in this post, the GIC type of filter has ben around my head since the very first time I built my own DAC last year, so I think I will do it now.

But before I am going straight to this GIC filter topic, perhaps for clearer understanding about this, I should first introduce the various type of audio filter in the DAC analog section.


April 15, 2022

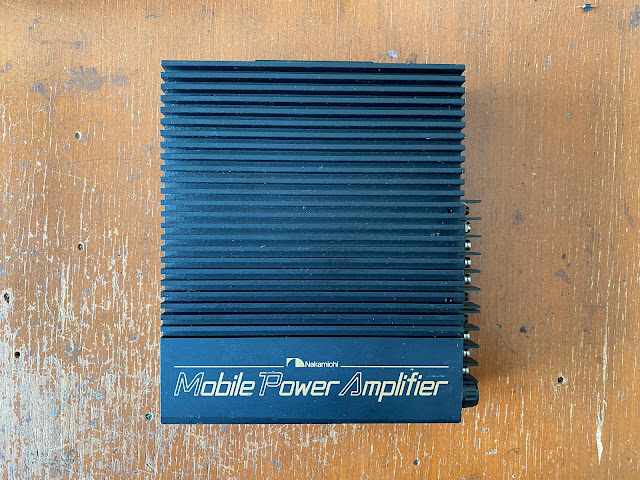
Nakamichi PA-200 Car Power Amplifier

If I remembering in my teenager age, there is only one car audio brand that really takes me to this audio hobby, which is the Nakamichi.

The 90's is the year full of great stuff. Car audio is also one of them. Nakamichi at that era is all made in Japan. The sound is so special because it has in-house sound signature.

Like what I have right now is the Nakamichi PA-200 car power amplifier. I bought this unit quite cheap and it is looks so neat. So in this post, I will exploring this unit and find what I got on it.


April 2, 2022

Nakamichi DAC-41 Car Audio DAC

The original Nakamichi is all made in Japan, before the acquisition to others Asian company. This original Nakamichi is so much different in quality compares with the recent Nakamichi. Like this one, this is the latest DAC from Nakamichi is DAC-41 that released on 2001. This is the successor of the famous Nakamichi DAC-101.

Nakamichi DAC-101 is 16 bit DAC using dual TDA1541A S1. I have did some review for this unit here and here.

This Nakamichi DAC-41 is 20 bit DAC. I will reveal the internal components in this post shortly. At that time, the war for highest bit number is just started. "The higher the number, the better the sound", this is a good point for a sales person.

So let's continue to see this DAC unit closely.


March 19, 2022

DIY Speaker To Headphone Amplifier Converter

For the desktop headphone amplifier, it doesn't need a dedicated one if you already have a home speaker amplifier. Especially if the home amplifier is great sounding and you like the sound from it, then connect it to your precious headphone can be done by following this project.

But they cannot connect directly from the speaker terminal to the headphone jack. The first reason is the current from the home amplifier is too large that may damaging the headphone connected. The second reason is sometimes the DC offset from home amplifier are too large for the headphone could handle. And the third reason is the unmatched impedance between speaker and the headphone. This third reason is more technical to discuss but this is what we will do with this DIY speaker to headphone amplifier converter.


March 7, 2022

Schematic DIY KT88 Single Ended Vacuum Tube Amplifier

I continue from the previous post about the vacuum tube amplifier that I bought cheap. In my initial inspection, this KT88 based vacuum tube amplifier is made with all used components inside. You might not willing to turn this amplifier ON with this poor safety condition.

Further inspection, I found that this amplifier is a single ended KT88 with large output transformer. No wonder why this amplifier sound so wonderful.

In this post I will share the schematic along with replacing almost all the components inside that I think they are all junk.


March 1, 2022

I Bought DIY KT88 Vacuum Tube Amplifier, Cheap & Ugly Inside

I am not a vacuum tube guy. I never build any vacuum tube audio system, either it is a pre-amplifier, buffer stage, a vacuum tube output DAC, or anything related to vacuum tube from ground up.

You might already know this if you following my blog for quite some time. The Bottlehead Crack is the only vacuum tube amplifier that bought in the used condition. Then I just upgrading it. The others vacuum tube amplifier is a hybrid with an op-amp and operate in low voltage. Yes I made it but it doesn't count as a pure vacuum tube amplifier I guess.

I am not hate it, but instead I loved how the vacuum tube sound. It is very musical, detail with lots of energy and dynamic. The vocal from vacuum tube amplifier are sweet and more bodied. It feels like you are covered with the soul of the music played. Unlike the solid-state that some times feels cold and edgy, but I still doesn't want to swim it deeper to this vacuum tube world. I know my limitation when building an audio gear, it must be great and using the best possible components available. So I love at this point where my audio system run from the more affordable solid-state components instead the vacuum tube. I hope it is a good excuse for me:)

So if I want a vacuum tube amplifier for driving my speakers, I prefer to bought it. Like today post, this is a review of others built vacuum tube amplifier. This amplifier is in second hand condition and the cost is about US$200! So let's take a look.


February 11, 2022

DIY Regulated Linear Power Supply For Raspberry Pi Under US$20

I tried to be honest. I often laugh reading many feedback in the online forum discussion when they tried to answer a question about: "is it necessary to have a linear power supply for Raspberry Pi?"

Yes, we are talking Raspberry Pi as media player or NAS connected by a HAT to send the digital out to the better performance external DAC. Then will it improve the sound quality by only changing from cheap switching power supply to the linear? I guess you have find this same conversation in many forum as well.

I understand that buying a finished linear power supply product can be costly. Let's say the price of this mostly above US$100 and spending such that money seems totally useless because your opinion already broken from that forum feedback. They are saying that linear power supply for computer is not logical at all to give any benefit. Which in my opinion their feedback has nothing to do with practical experience, but only based on their subjective opinion. Period!

So I put US$20 on the table and made one for you. Let's begin:)


February 2, 2022

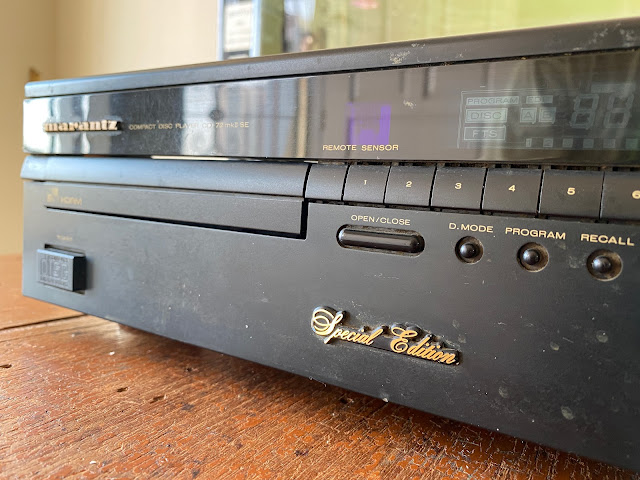
Marantz CD72 MK2 SP Modification To DAC

The old CD player is probably sound better than currently "Hi-Res" audio player. Either you music collection has been shift to the streaming provider, or just like me, converting all my CD's collection to WAV files and stored in one media library for more practical use, then unfortunately this CD player might not be use anymore.

In the most cases, those high quality CD player are already broken. Especially for the optical lens which will wear by ages, then replacing those part might be cost very expensive. There is also an issue that the reliability of replacement part might be not as good as the original. It is frustrating to keep using those old CD player for sure.

I took the example of this Marantz CD72 MK2 SP I owned. I loved the sound quality from this CD player and of course the look. It is copper chassis inside out.

More detail, the DAC IC using in this unit is the best high-performance single bit DAC. It is the TDA1547 along with SAA7350, aka DAC7.

So I think, I will modify this CD player to become a stand alone DAC unit. The goal is having the same sound signature from this old CD player but with better input flexibility like the stand alone DAC unit.


January 21, 2022

The Internal Components Marantz CD72 MK2 SP

Ken Ishiwata is the man behind Marantz. The Marantz product that released on 90's, especially if they are made in Japan, probably they are coming from his design.

Same like mine here. This is the Marantz CD player, CD72 MK2 SP.

The SP is for "Special Edition" which better than the original CD72. I bought this unit in the second hand condition and it is quite dirty. The good things is all parts are original and never been open before. I think the unit like this, especially for the Special Edition Marantz are worth to collect.


January 14, 2022

Camelot Dragon Pro2 Jitter Reducer & Resolution Enhancer Review

I guess my journey for the best DAC has finished. I put the link for every DAC I built last year in the single post here. I couldn't ask for more since I already have the best sounding DAC.

The music from the DAC using PCM63, AD1865 or TDA1541 is all wonderful. But again, audiophile is a hobby. For me this is a journey to have the best possible audio playback. It is not end yet, especially when I borrowed this Camelot Dragon Pro2 from my friend. I already have the best DAC with the optimal implementation, is this unit necessary? Let's find out.


January 4, 2022

Build Your Own Portable TDA1543 USB DAC Headphone Amplifier

Happy new year 2022!

This is my first post in this year dedicated for everyone who want to build a DAC. I am pretty sure that most of my previous DAC project are not for beginner. It is complicated and need lots experiment when built them. This would be a barrier for the new comers to enter in this hobby, especially when the cost of those DAC IC are expensive, then making a DAC like that for the first time is highly risk to fail.

Then, I was thinking about a simple and cheap DAC to build. This should be reliable and good sounding DAC of course. Then my choice for this USB DAC + headphone amplifier project is TDA1543 DAC. This is cheap DAC IC and still available today. So let's heat the iron:)