
Nakamichi DAC-101 (Part 2) The Internal Components

Continuing my previous post about initial review of the dual TDA1541 S1 DAC from Nakamichi DAC-101 is surprisingly over my expectation compares to the previous review is CD Player Sony CDP-750 using single TDA1541A.

No wonder the CDP-750 is for budget CD player while the Nakamichi DAC-101 is a hi-end car audio components will sound much better. This Nakamichi DAC-101 is install in my home audio system by using 12 volt 5 ampere low noise SMPS wall adapter as main power supply to the unit. The sound characteristic from this DAC is smooth yet detail with the strong point in the warm of the vocal presentation.

Unfortunately this unit cannot pass the first 3 hours playing in my home audio system. It burnt and break-down. So, with lots of optimism with this unit, I will continue to see what the components inside it.


Disassembly this DAC unit is straight forward. Few screws removed from the bottom chassis and the side steel plate then I can have all the access to the internal components.

The first things I notice is the copper plate covering important circuit underneath it. This kind method is easily find in the hi-end audio for better low noise.


The PCB is dual layer wood material board. This PCB is very common for 90's electronic product. No fiberglass PCB here.

Another thick copper on the top of the two bellow is a heat-sink for the voltage regulator.


These are the 4 pieces IC volt regulator for supply the dual TDA1541 S1 and the analog stages.


As you can see the analog stages after the DAC is very complicated. They are 4 op-amps and few transistor.

The engineering from Nakamichi has think it so hard to make this kind of circuit. Yet the result is astonishing sound quality.


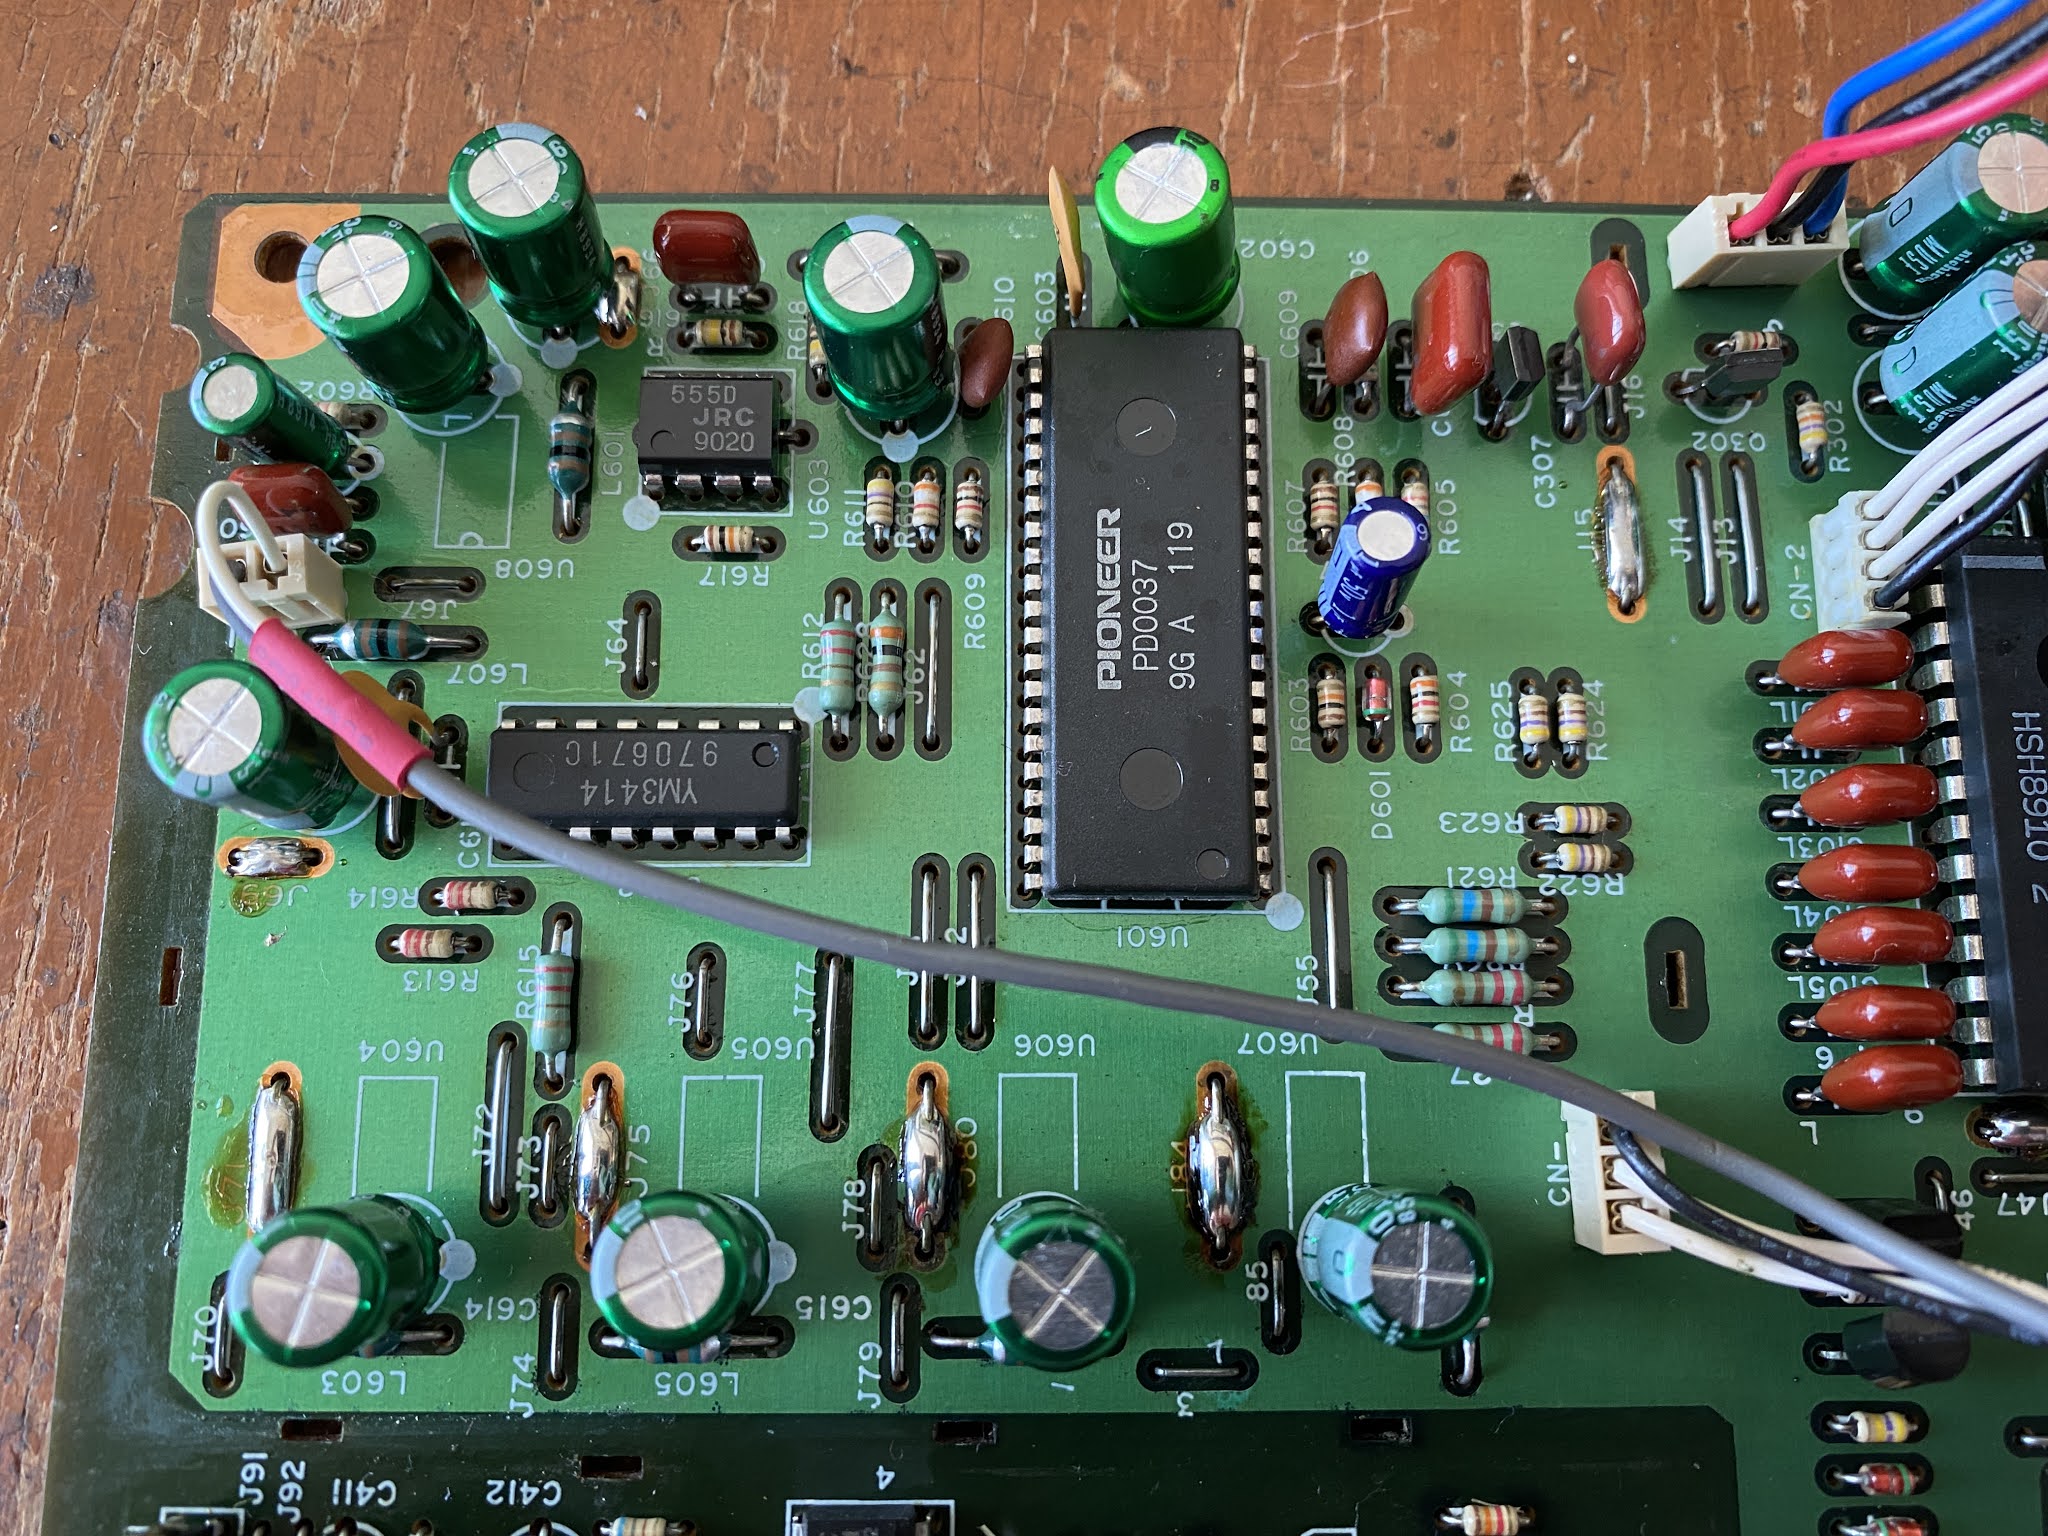
I make some marks on the picture below to explain each components category in this DAC unit.


Deeper inspection to the problem in my previous post is for sure inside this power supply unit. This indicated by the copper cover in the power supply unit is very hot and radiated to the whole unit heatsink. The funny smell is also come from inside of it.

The copper case is installed back-to-back on the PCB, so with de-solder the pins, they can be remove easily.

I also notice this power supply unit has been repaired before. It is easy to notice by see few capacitors brands are not the same with others. The new capacitors are using lower quality which very common if you ask a television repairman to do this kind of hi-end equipment repaired.


The PCB trace on the bottom side are mostly broken. This kind PCB is could not withstand with many de-soldering process.


Then this is the main reason where the smelly things came from. The main power supply transistor is almost cut by half! It cannot handle the current very well yet the heatsink is just too small.


Looking to the power supply circuit, it is basically 2 different unit in one board. The broken one is the dual voltage for the DAC and analog circuit. Then the other power supply is DC 5 volt only handle for the digital receiver unit.

The dual voltage power supply require high current which this power supply cannot handle very well. Despite there is a problem previously in this repaired power supply unit, it is clearly indicate that the Nakamichi DAC-101 has bad performance power supply design from the beginning.

I will not doing another repair on the bad design power supply like this. It is just wasting my time and yet there will be no improvement on the sound quality after all. Because the main reason I am using this DAC is for home audio system, then the next upgrade will be modify this power supply unit using external linear power supply for better linearity. This new power supply will deliver higher current for the DAC circuit. I will cover this upgrade on the next post.

Meanwhile, I still not finish open up all the copper cover.

The next one is the digital receiver unit, let's continue.


This digital receiver circuit in my opinion is clean and neat in the components arrangement.

The digital receiver is using PD0037 and the oversampling is using YM3414.


On the bottom of this unit lying few IC's that glue-logic IC for separate the digital signal to the dual TDA1541A S1 DAC.


The next things is finding the dual TDA1541 S1 DAC underneath the copper plate. This is the main reason for this Nakamichi DAC-101 is become a hi-end status.

Think that this DAC is came from the bubble economic era and the growing market of the first digital audio, so every manufacturer push their limit to create a hi-end product like this.

So I guess I had covered up all the internal components in this DAC.

There are a lot rooms to upgrade in this unit that I will be cover it up on the next post.

Disclaimer: Any statement and photos in this article are not allowed to copy or publish without written permission from the writer. Any injury or loss from following tips in this article is not under writer responsibility.

Comments

Popular posts from this blog

OPA1622 Vs. OPA627 High Performance Op-amps Comparison

This op-amps comparison topic is actually boring, but at the same time, many of us still curious about what others think about it. The reason is simply because of the op-amps variation are hundreds and they are depends by the implementation. The op-amps are considerably cheap and an interchangeable electronic components but they are not built for the same function. So in this discussion, I will focus on the modern Vs. vintage high performance op-amps in the simple non-inverting pre-amplifier gain stage.

Vintage Multibit R2R DAC Tier List

At the very beginning of this year, I committed to explore the best multi-bit R2R DAC. This is simply because I have plenty of the resources (from broken old unit CD player of course) and ability to build them up. If you think this kind a recycle from old un-used unit to become something useful, than I should stated myself giving contribute for greener world:) After all DAC that I built in this year, I think it is better for me to list them up again in one single page like this. Then I will rank them up in a simple tier list. The reason for this, so you all know what my opinion about of those vintage multibit R2R DAC especially in the sound quality.

TDA1543 DAC Review In 2021

It is a fine day and as usual I am reading and searching online contents related to almost anything I like. During my search, I stop to the few online forum discuss about a simple DAC using TDA1543 DAC IC. The discussion about this DAC was about 3 years ago, and the latest was about a year ago. Quite new and overall discussion about this DAC sound quality mostly are positive. It is interesting topic anyway especially I was built this TDA1543 DAC long time ago in 2016. At that time, I combine this DAC with Tripath amplifier  here  and  here  before it sold in 2019. That is also my first DIY DAC and I am quite enjoyed this DAC so much, at that time. The background story about this, previously I was using Sony Playstation SCPH-1002 as my reference CD Player. The reason I moved to this TDA1543 DAC is because the CD optic inside the Playstation is wear out and I cannot find the replacement for it. I pretty remember the sound quality of this TDA1543 DAC is quite comparable...