The story of this week is I just bought the Alpine DAC 3900 at the fair price. The overall condition for such this 30+ years old unit is in my opinion, excellent!
The Alpine car audio launch this DAC 3900 series along with the cassette/ control head unit and the CD changer 5959. Yes, at that time, CD is the king and this DAC 3900 is the components of the highest grade of Alpine car audio at that time.
So in this post, I am not just preview the outside of this DAC 3900 but also what inside it.
Please enjoy:)

Honestly, I never look this unit before by my own eyes. Instead, I just saw it on 1993 Alpine brochure.
Looking directly to this DAC 3900, I can feel how high quality finished it has. It is all black aluminum body on top with gold color display panel at the center.
The internal chassis is all copper. This material is become the standard for the hi-end audio equipment until now due to it's lower noise behavior to the music.
This unit is very expensive when it is first launch. Seems hard to afford by most common people, especially for me which only a poor student at that time.


I guess you might wondering why on earth I bought this vintage car audio DAC?
This Alpine DAC 3900 should connect to the dedicated Alpine head unit and CD changer to make it work right?
The answer is simply no.


This DAC 3900 can become a stand alone DAC.
All I have to do is connect the DC 12 volt to the power input. I am using a wire to short the REMOTE and the BATT to make this unit turn ON.
Then use the fixed level output to connect to the amplifier.
The only setting are the switches on the others side. The fixed level output switch is set to ON and AUX digital input is set to ON.
The digital input can be choose between those three Toslink optical input. This DAC 3900 is only accept the digital input by this method only.
.JPG)
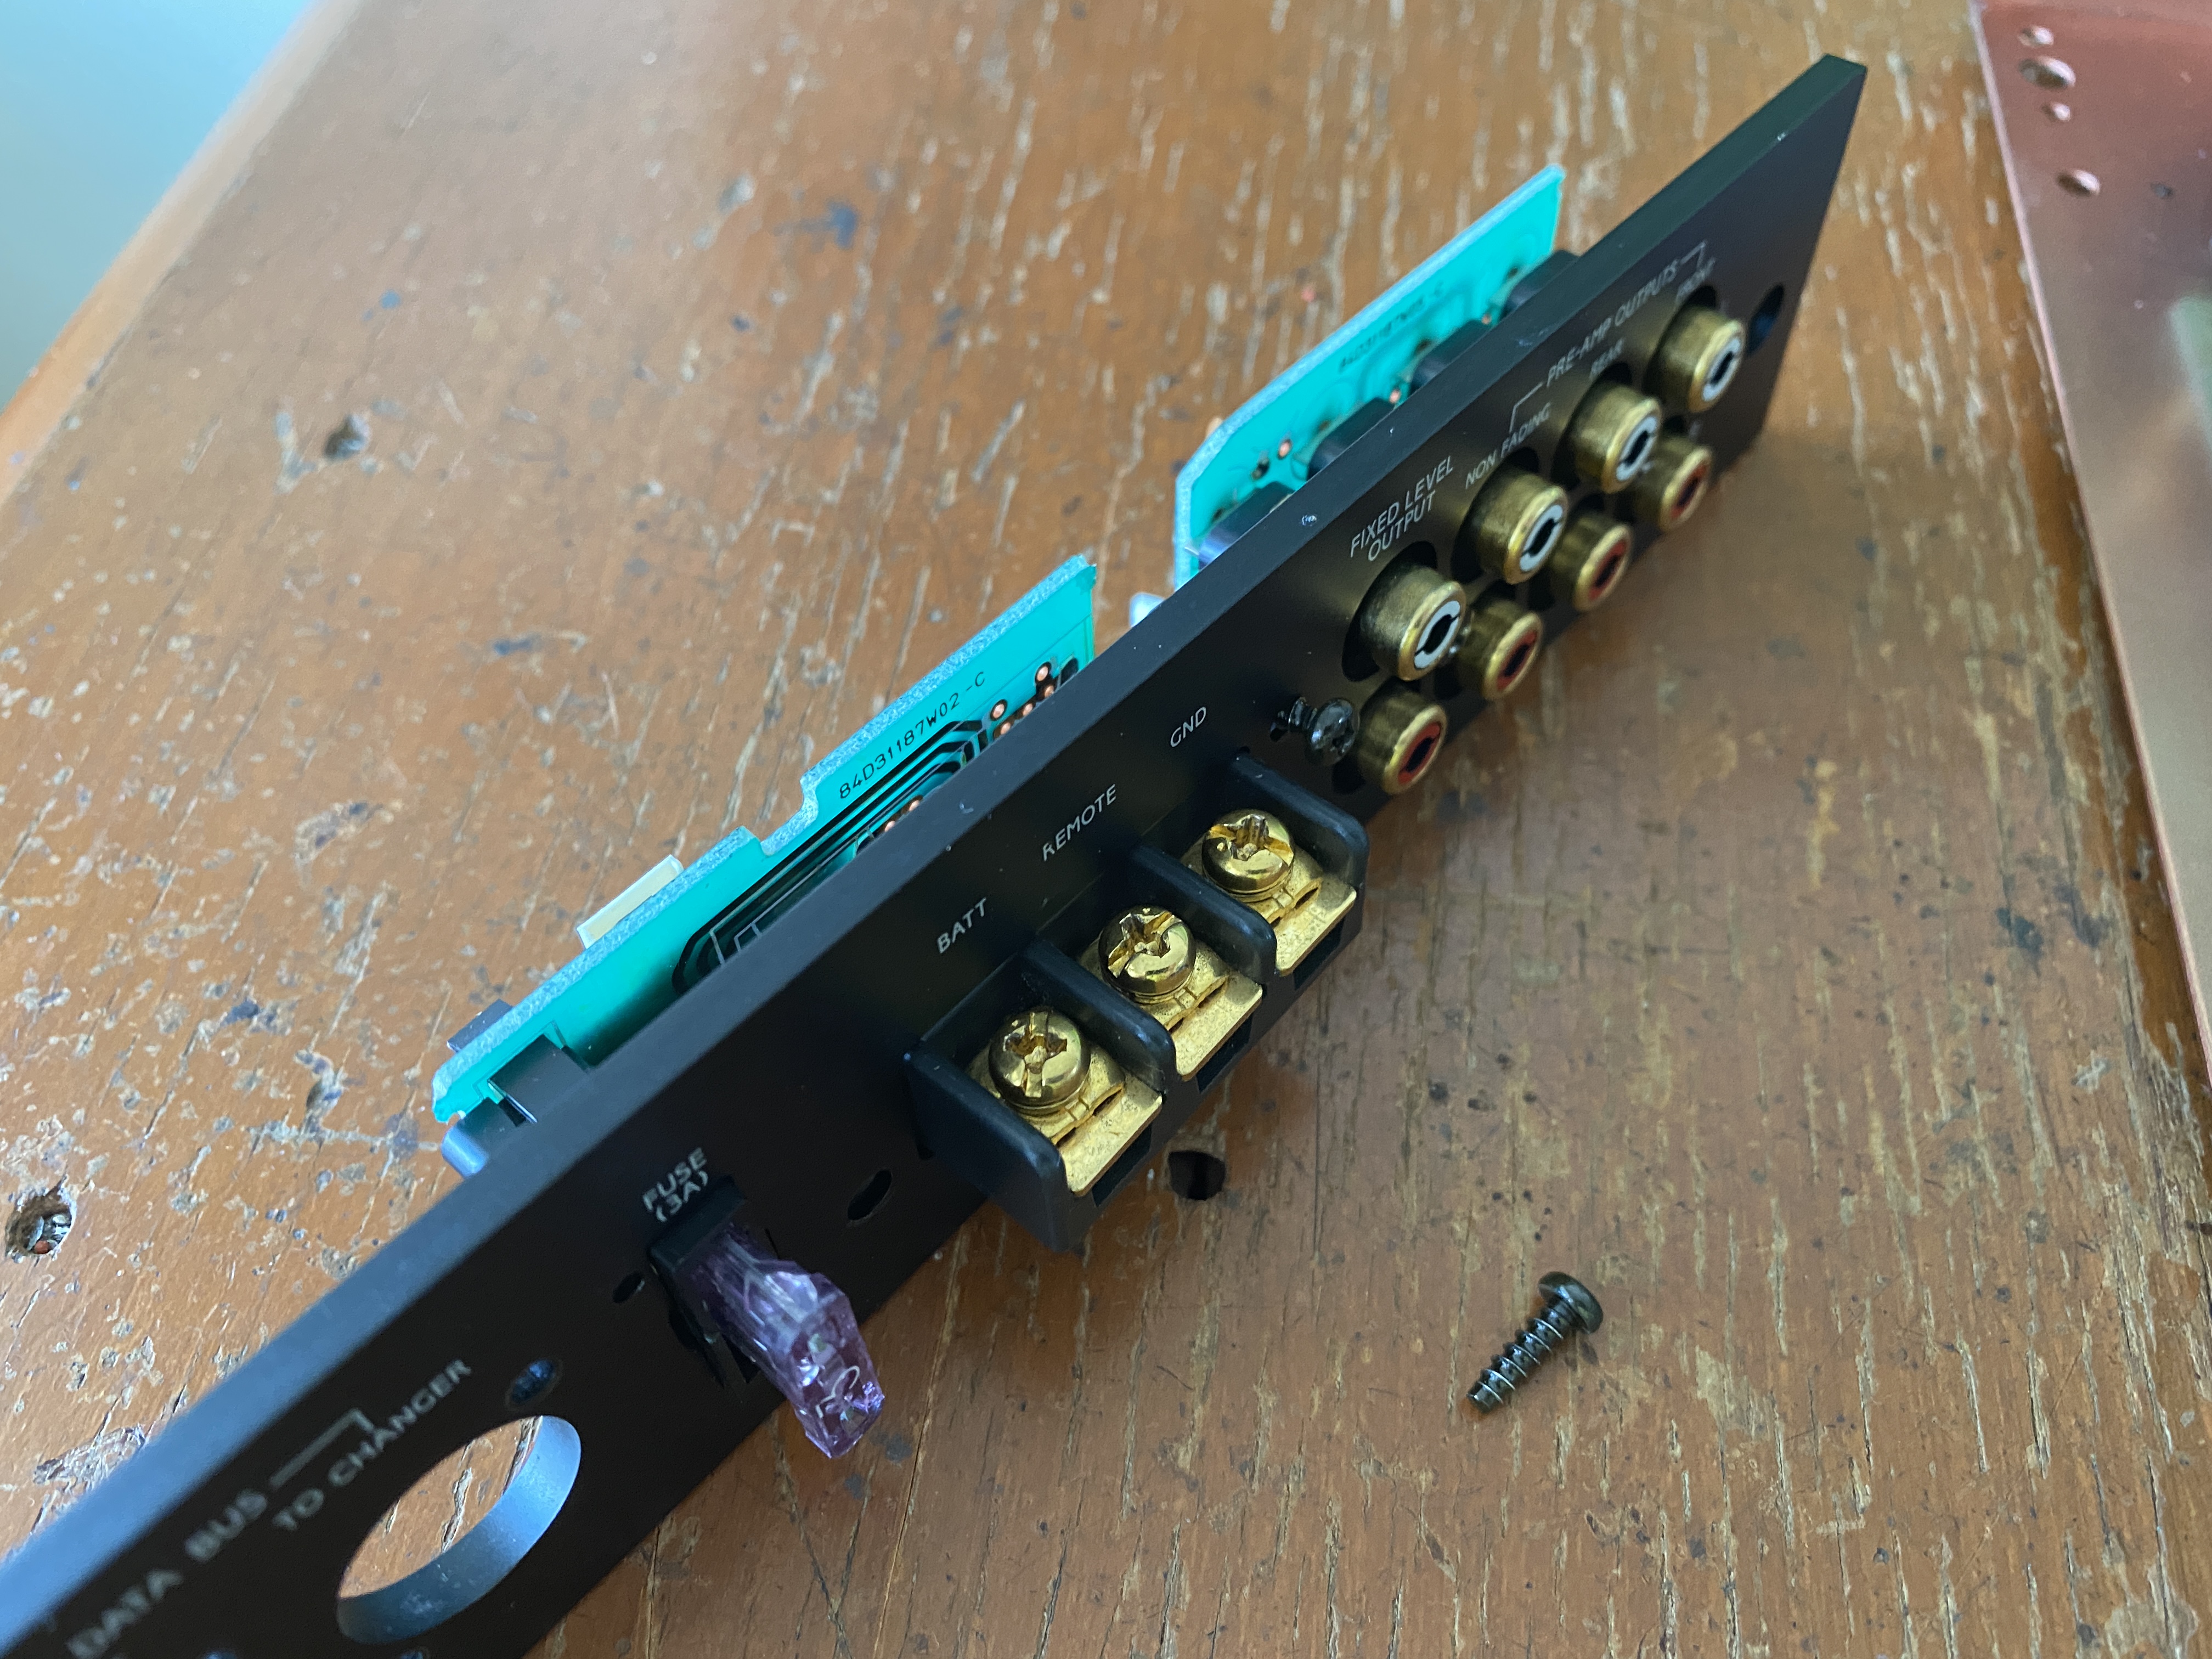
As usual, it wasn't me if I am not open up this unit to see what components inside.


I start to open the side aluminum panel first. Look how thick the aluminum panel that Alpine use here.
Then I continue to the other side.


After all bolts are removed, now I can see the DATA BUS connector that intended to connect this DAC between the head unit and the CD changer is basically just a straight jumper connection, except it took the digital signal to this DAC to control the internal volume control. I will talked about it later.

Now I continue to open the top aluminum cover by remove several screw at the bottom of the chassis.


The internal of this DAC 3900 is now reveal.
Again, I still amazed on how great the parts that use in this DAC 3900. Start from the chassis, plugs, PCB and components arrangement.

Dissemble all components inside are quite easy. Especially for the internal main board to the input/output connectors are connected using sockets. So they can be remove easily for this purpose.
All of the pins function also marked on the correspondences board.


And this is the main board unit.
As per Alpine advertised on it's catalogue, it is true that the analog and the digital board section are separated each others.


The top board is the digital section and the bottom board is the analog with the power supply section. The placement is sandwiched together isolated with the copper shield on the center.
The components for the digital section are on the bottom of the board.
I inspect the top PCB and all correspondent pins of the IC's are marked clearly on it. There is also 3 square LED to display the DAC sample rate and power indicator located at top unit of this DAC 3900.


This is the display on the top of the unit that I mentioned with the LED's before. This is how I illustrate the LED display when I beam the display manually.

So I start to disassemble the digital board to check what DAC components that this unit use.

Once all bolts are removed, then I can now inspect the DAC components use in this digital section unit.
This DAC unit using 4 pieces PCM55HP DAC IC. I believe configure 2 IC per channel in balanced configuration.
The power supply is feed through JRC 7805 and 7905 IC regulator one set per channel.
The filter capacitor are using red Elna marked "for audio" which it is the Elna Cerafine for sure.
The logic control input is hide underneath the copper box and I don't think I need to open it anyway.


The input selector for the three Toslink optical digital input is goes to TC9245M receiver IC. This receiver select the input based on the signal coming.
If you look closely, there are two small polystyrene capacitor bellow the receiver IC. This high quality polystyrene capacitor is special because it covered with copper sheet which only can find on hi-end audio like this.


The next turn is open up the copper shield and reveal the power supply and analog section on the same PCB underneath.


Overall design for the power supply section is quite straight forward.
The 12 volt power supply input goes to the voltage splitter IC to make the dual rail output voltage or differential + 10 volt and - 10 volt. They are regulated using a transistor for each rail.
This DAC 3900 power supply doesn't use switching toroidal transformer. This is possible since the voltage requirement to this unit are lower than the voltage input from the main supply.


And this is the complete view of the analog section board.

I wish I could see the discrete circuit for the analog audio section, but this DAC 3900 still use a popular op-amps approach. It using the 5238 op-amps, the era before 5532 I think.
There are few capacitors for the DC blocking at the audio output after those op-amps. Again, the capacitors are Elna Cerafine for sure.

The previous section before the output op-amps is the volume control IC.
Like I explain earlier, when the switches in this DAC 3900 is set ON at the AUX input and the Fixed Level Output, then this IC are pass through without any volume control interference to the audio signal.

What I still don't know is the function for 2 pieces AD7118K DAC IC besides the volume control IC mentioned above. It is near the analog input via RCA but the after I check the PCB traces they doesn't have any relevant to this circuit .
For sure the RCA input is the analog audio input goes directly to the volume control IC. The relays near it is to control the input that preferable selected by this unit automatically.

On the other side of this PCB is lying a DSP IC that controlled by the BUS input to the head unit. It is such a rare sight for today electronic to using a DIP IC like this.

I think that's all I can share about this beautiful Alpine DAC 3900 internal components.
The parts is all high quality and the condition I bought is all in the original states.
So the last steps is I assembly all parts together again.


Another things is I always appreciate the hi-end audio components like this. The attention to detail is remarkable. See the rubber protector near the installation holes? The holes are actually covered with thick rubber to prevent this precious unit get scratch when installed in car.


So that's all for the reveal of the internal of this Alpine DAC 3900.
Hope you enjoy it.
Cheers.

Disclaimer: Any statement and photos in this article are not allowed to copy or publish without written permission from the writer. Any injury or loss from following tips in this article is not under writer responsibility.
Hi,
ReplyDeleteCould you tell me what is the rca output volts of this DAC? Thank you.
Hi, not sure about that, should be around 2v.
DeleteHi, the manual said its 0.75volts which is too low for my 4 volts need. I just bought one to use in my car. Can you advice mod it to put out 4 volts or using separate line driver? i cant find good line driver though. thank you.
ReplyDelete