In this part 2 of modification the Nakamichi DAC-101 will focusing on the power supply inside the DAC unit.
So in order to accept the new power lines from the external power supply as describes in the part 1, (which are DC +17 volt and DC -17 volt and center tap as the ground) to the existing power terminal on this DAC unit, I need to bypass the internal switching power supply then directly connect to the DAC power regulator. This will result to a clean looking DAC which I will love to see because it keep maintaining the original Nakamichi DAC chassis on my listening room.
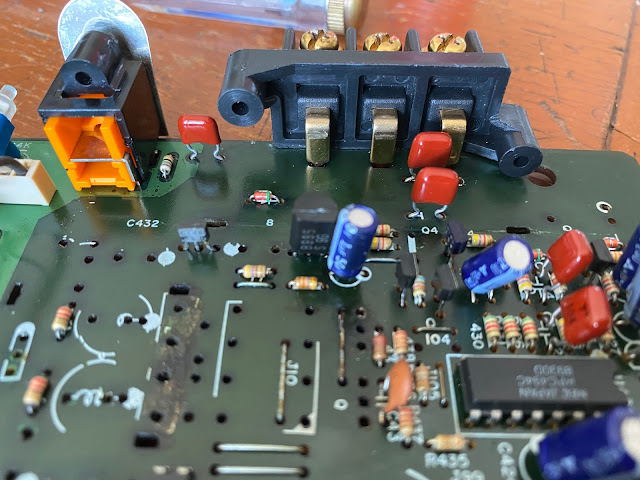
First step is remove the components behind the power terminal. This is including the fuse, the capacitors, jumpers and diodes that connect to the power terminal and to other components on the main board.
It is also a good time to remove internal switching power supply components which they are now unnecessary to stay there. You can remove all of them, but in my case, I only remove few big components especially for the transformers and capacitors.
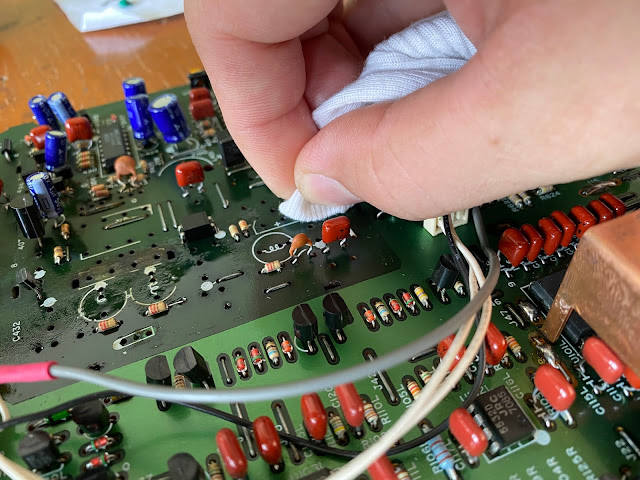
I do some cleaning to the main board, this corrosion is because of the blown capacitors and IC.
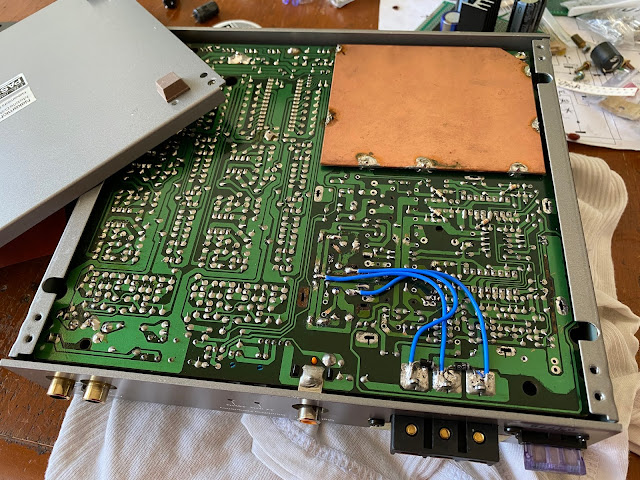
I should describe that the main power require for this DAC to operate is by connecting three cables, the red, the black and the blue directly to the external power supply. The Red is for DC +17 volt, the black is for DC -17 volt and black for ground or center tap.
This voltage requirement from the external power supply is actually not should be +/-17 volt CT. You can using power supply up to 30 volt CT without any problem. The only concern if running to the higher voltage is the capacitor voltage limitation and the heat generate from the regulators that should be increase as well.
The next step is taken the original socket where the power lines goes to the DAC voltage regulator.
I braided the power cables and connect to the existing location. I still using the choke from the old parts, I think they are good chokes, but the capacitor for DC filter are replaced with Nichicon Muse green, same type as many capacitors using in this Nakamichi DAC unit.
Then I connect the jumper cable from the power terminal to the choke at the back of the main board before the power lines socket to the regulator DAC. This is the reason why I should clean all components connecting to this terminal to avoid any unused components interfere.
You also can see I using 2 diodes 1N4001 across the power terminal. This is only for safety reason when accidentally I do wrong connection between this DAC unit to the external power supply. This diodes will shorten the power supply current and cause the fuse on the external power supply to blow. This is better than damaging the regulator or even the DAC IC itself.
After those steps are done, there is another step to do.
I need another power supply which is DC +5 volt for supply to the digital receiver unit. To have this voltage, I just take from the DC +17 volt to the additional 5 volt fixed positive regulator using IC 7805.
I also using Sanyo Oscon capacitor near the 7805 to reduce the voltage ripple and all IC pins are connect by a few length of cables to the main board. This 7805 will gets hot while operate and using those cables will give me flexibility to attach the IC regulator to the DAC chassis as the heatsink.
This is the connection I take from the DC +17 volt goes to 7805 regulator then goes to the digital receiver.
The 7805 is attach to the top of the heatsink. I using the same hole as the Nakamichi logo bolted on the case.
Because my 7805 is in plastic package, so I don't need any washer and spacer to avoid short circuit between IC body and chassis ground.
And that is all how I connect this Nakamichi DAC to the external power supply.
This power supply upgrade make a huge improvement to the sound quality. The background is darker, the sound is clearer and the vocal pronouce far better than using the OEM switching power supply. This DAC deliver the soul to the music with the richer detail.
I think I am not hallucinating at all. This improvement is real and the result from this upgrade is huge. This is just like reveal the true potential of dual TDA1541 S1.
The Nakamichi designer should be proud of me:)
Disclaimer: Any statement and photos in this article are not allowed to copy or publish without written permission from the writer. Any injury or loss from following tips in this article is not under writer responsibility.


No comments:
Post a Comment