This Mauro Penasa LM3886 amplifier is not typical Gainclone amplifier because it is not what it is.
This amplifier is published over 10 years ago and the designer name is Mauro Penasa. He was mimicking and redesigning this amplifier from his nostalgic good sounding vintage amplifier, the Musical Fidelity A370 amplifier.
If you read his design notes, he was really like the A370 amplifier so much and he think that today amplifier is not as good as it. The sound of A370 can only be compete with most linear class A amplifier that inefficient, hot, and heavy. That is why he redesign the A370 but using LM3886 IC for more economical approach. This LM3886 act as current pump and the op-amp is LM318 act as voltage gain.
Yes, it is using op-amp, same like the original design as well. The goal for this amplifier is like having a good class A sounding amplifier with the efficiency of class AB just like the A370 original design.
This amplifier is quite famous in DIY audio for years and I will try to build it now.

I knew this amplifier since the first time it discussed on the diyaudio.com many years ago and I wish I can build it someday.
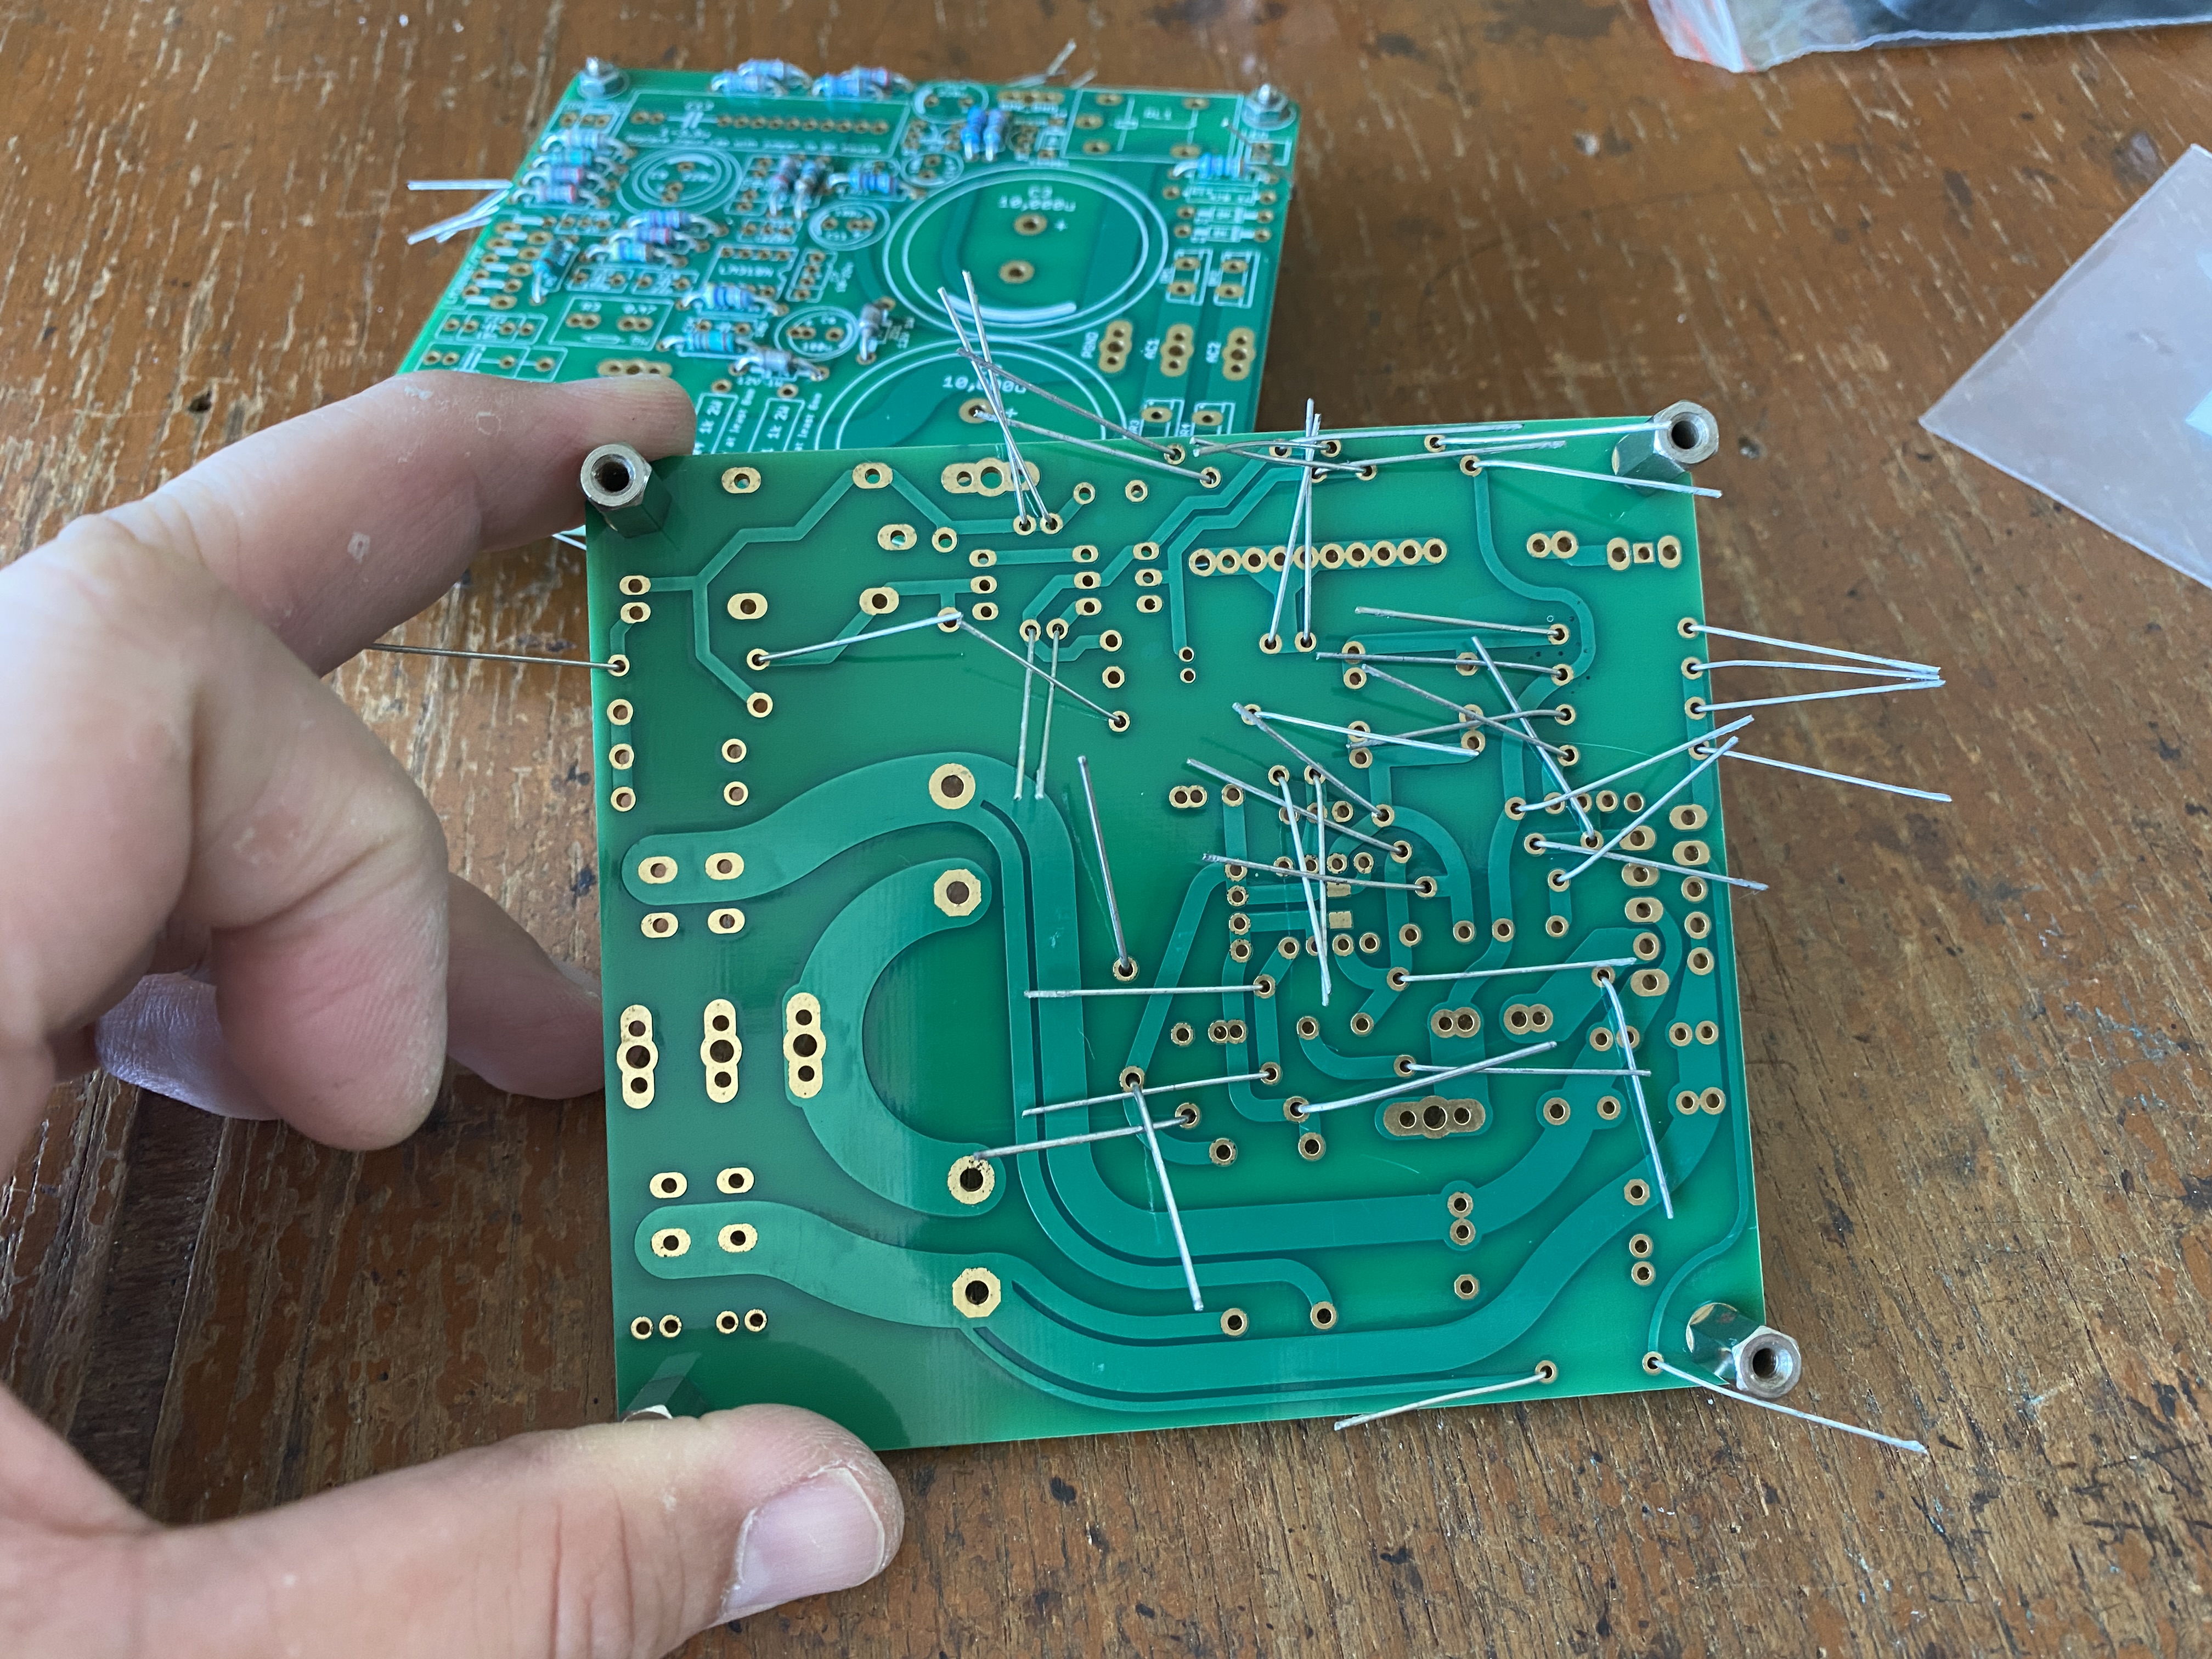
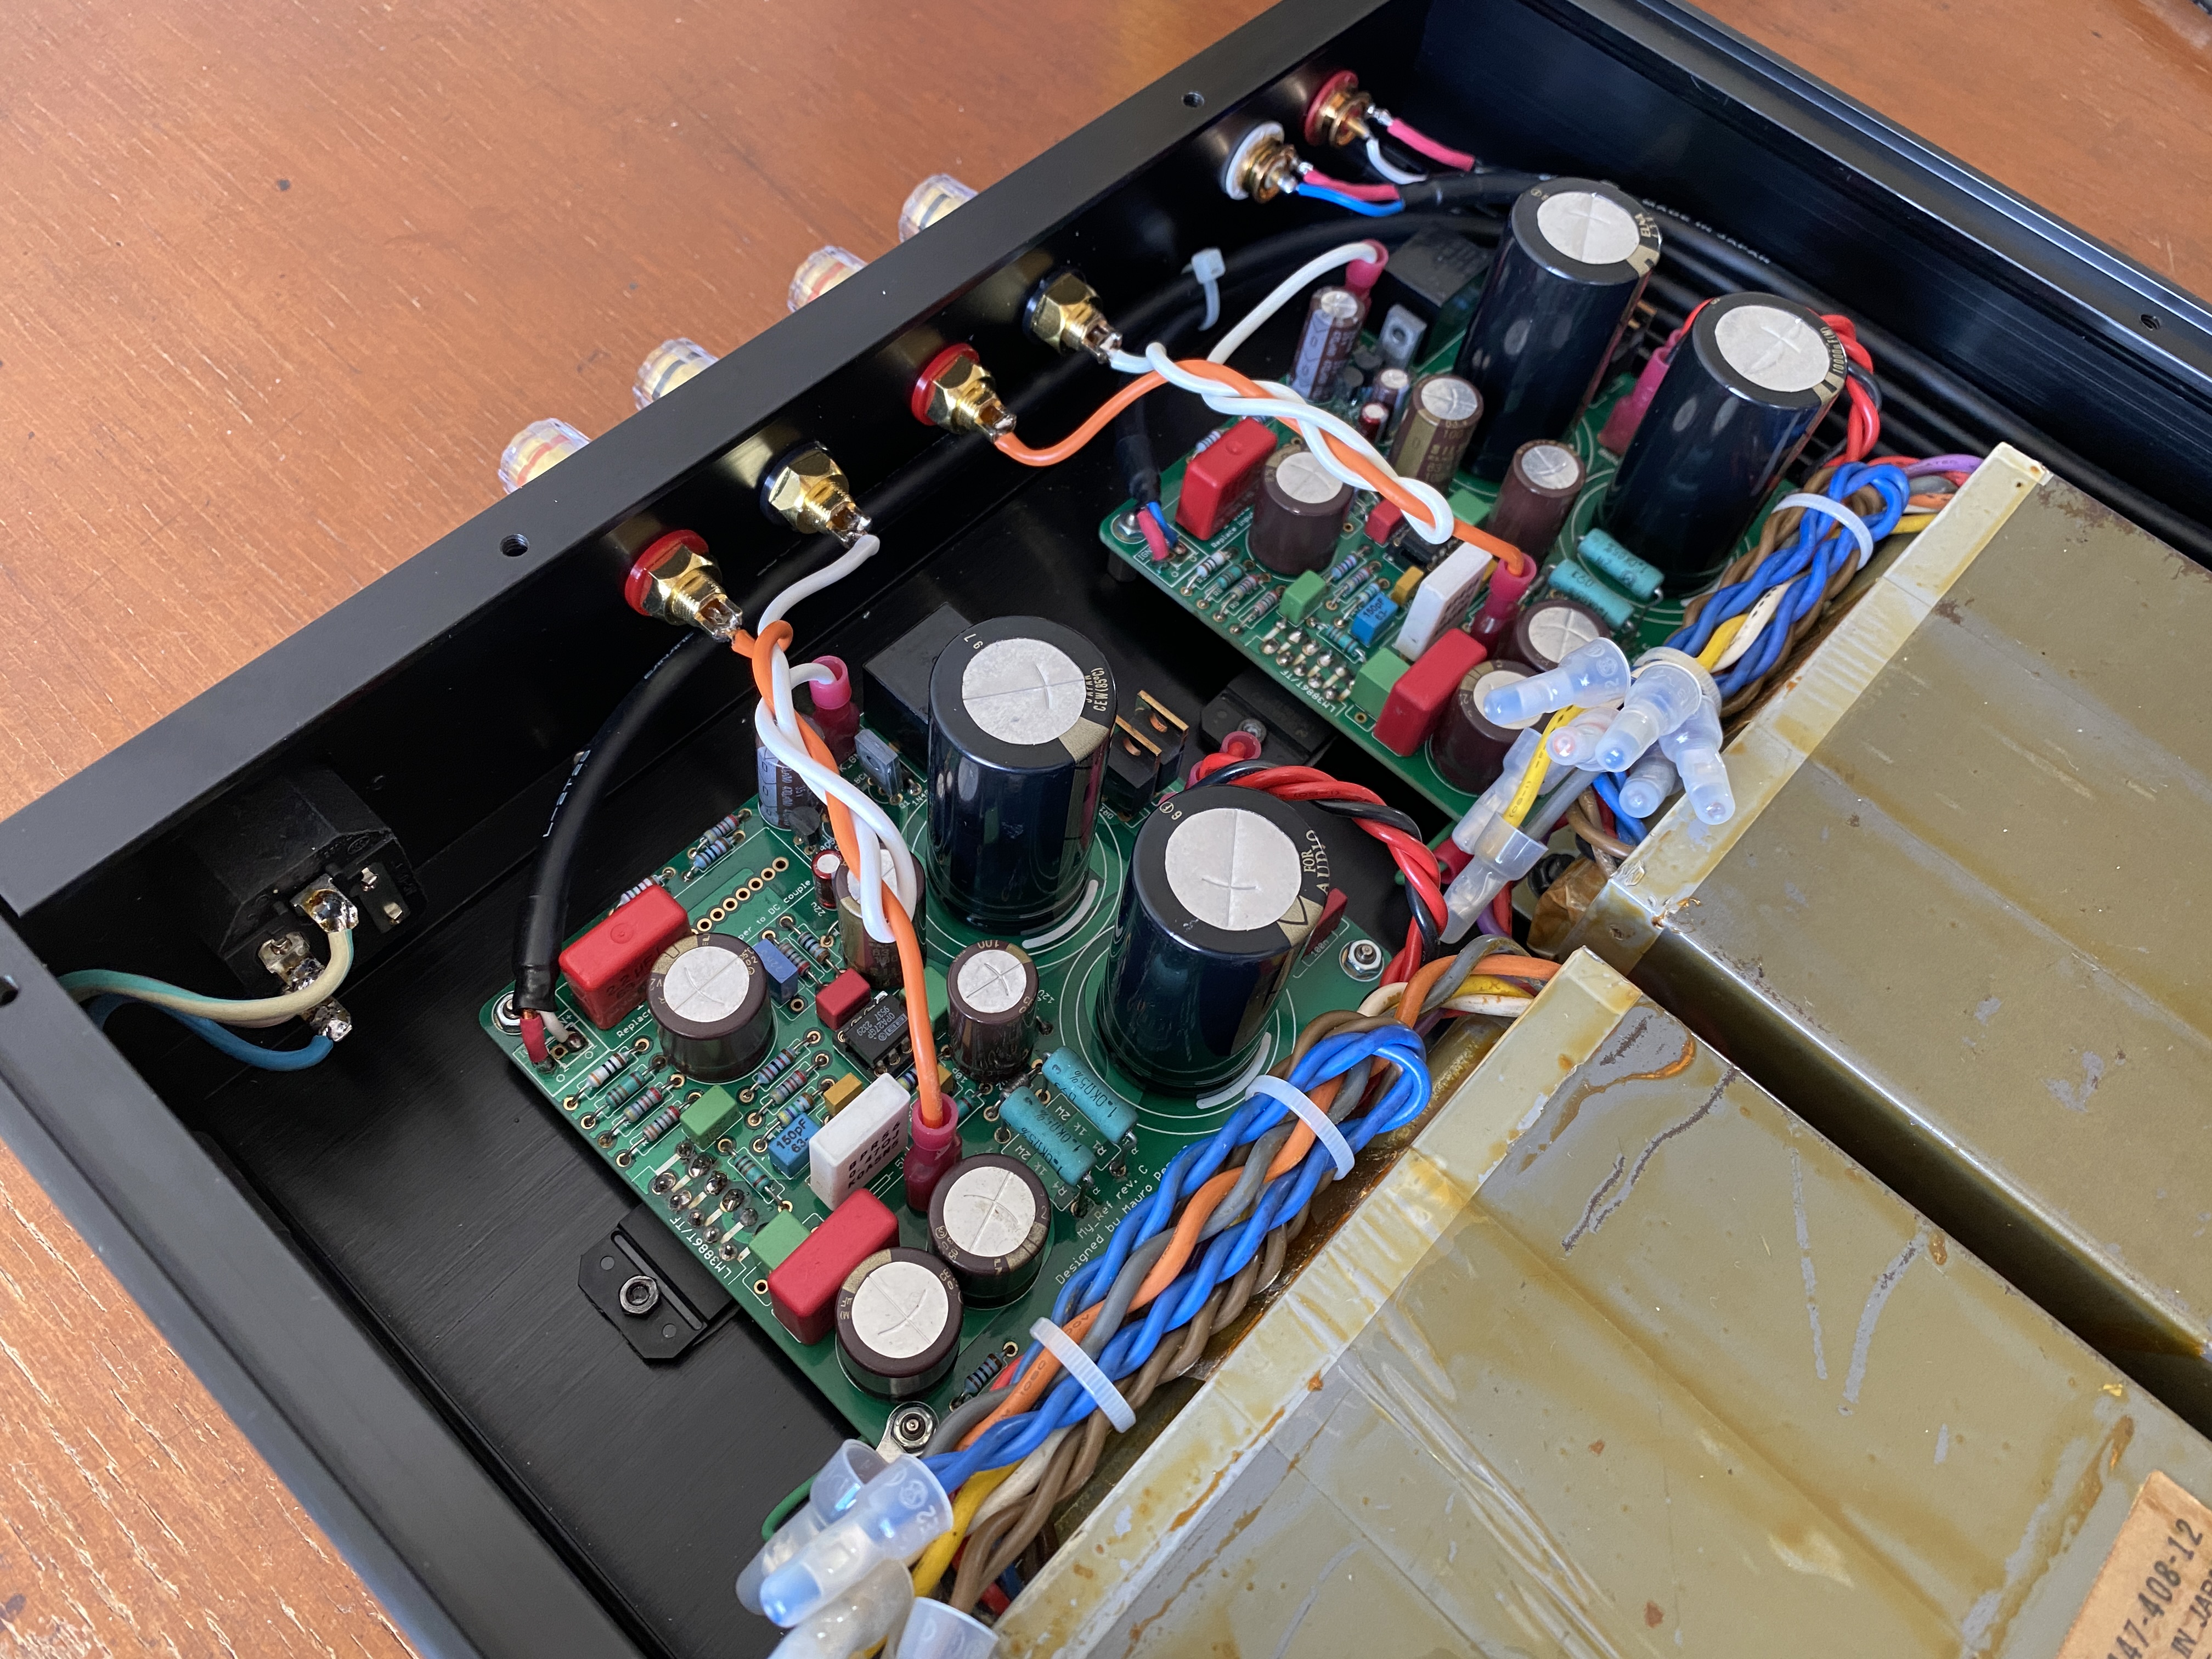
A month ago the idea of making this Mauro Penasa amplifier is started again when I got the original this amplifier PCB My Ref version. This PCB quality is very good, well designed layout, and thick for both the fiberglass board and the copper traces.
A single PCB only for a channel. I need a pair to make it stereo amplifier. Each of the PCB have their own independent power supply circuitry, meaning I can optimized this PCB layout for dual mono configuration, one power transformer per channel.


If you aware and study carefully on every amplifier design, the most important components is the power transformer. It can fit half of the size of the whole unit amplifier itself. Then the power capacitors and the heatsink are the following to the space eater in an amplifier.
Power transformer is the most important components in the amplifier build. Although the amplifier design is very important and should be correct, but the quality of the power transformer should be put at the top priority because it impact directly to the stability and the sound quality of an amplifier.
In this build, I am using used transformer from old Sony FH-7 Hi-fi mini component system. It is an EI transformer with copper shield inside and covered with metal sheet outside for minimum interference with others components nearby.

I took the transformer from two unit of Sony FH-7.


Each of those transformer are around 120 VA, maybe more. It is a low profile transformer, which is thin enough for me to use small size amplifier casing.
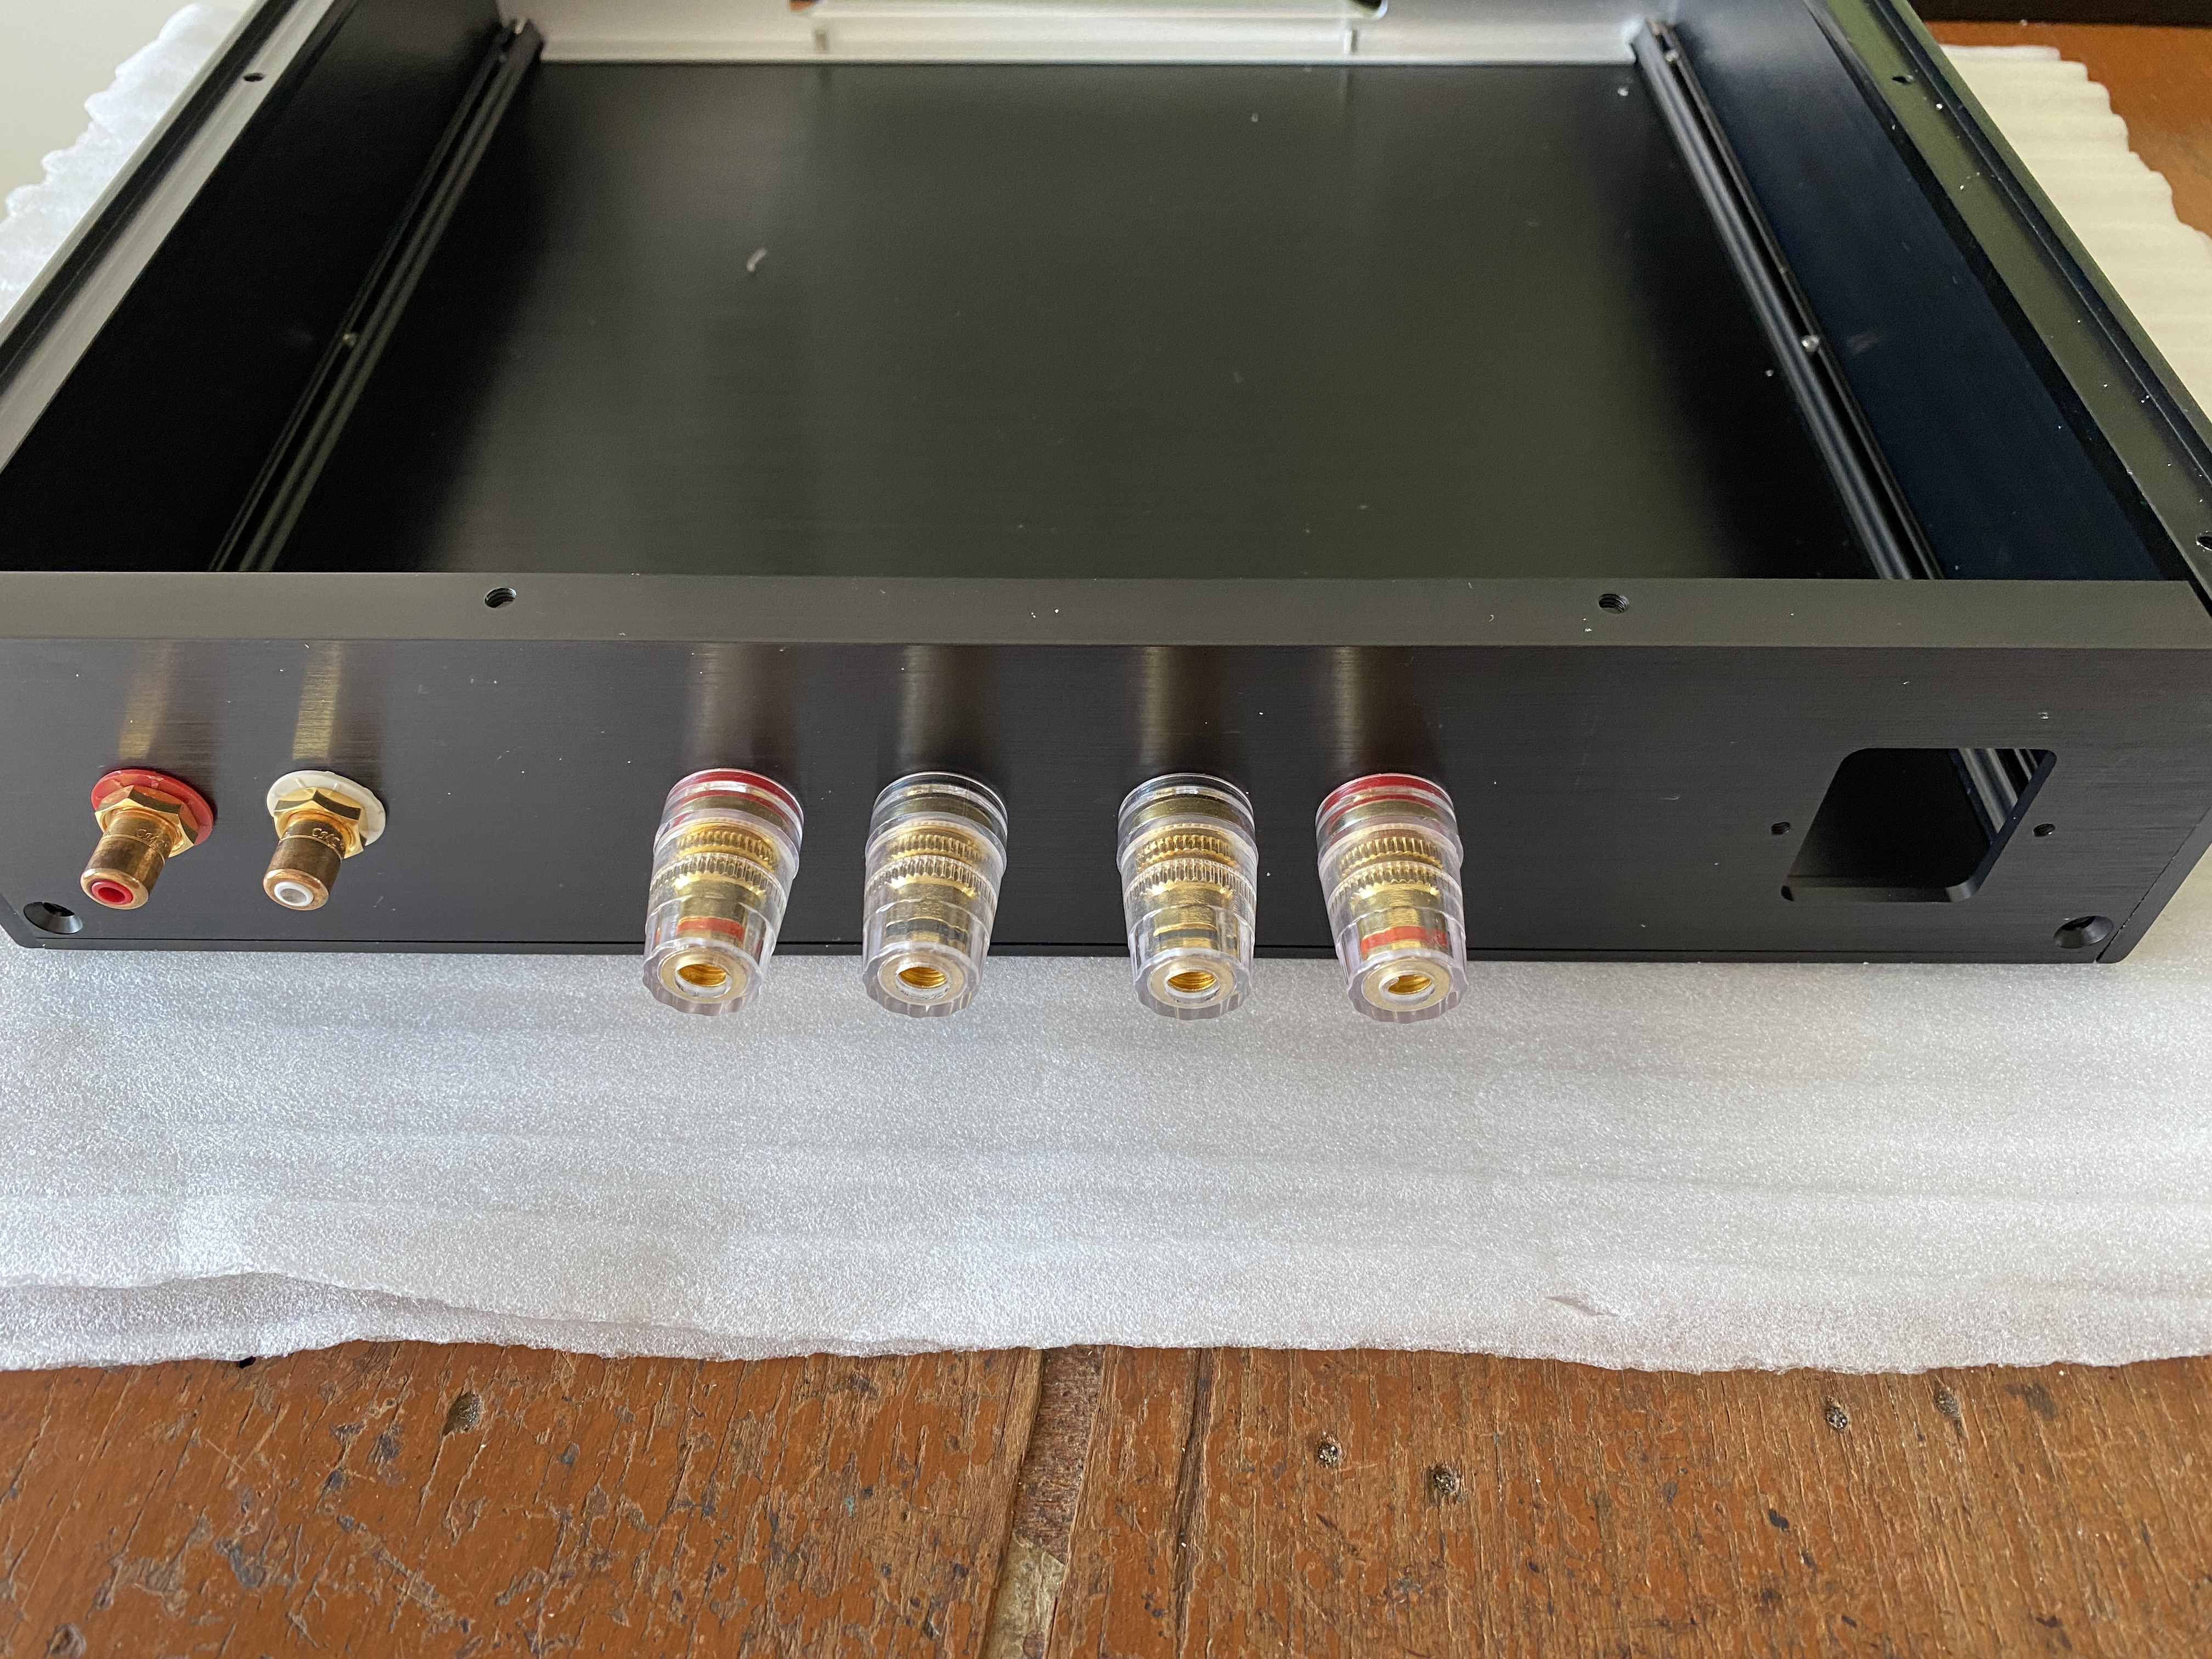
If you notice from my last PCM1704 DAC build, the casing that I use is also suitable for this amplifier build. Fortunately I bought the casing 2 unit and I will use it anyway.


I try to find the best components layout possible and then I can start populating the components on the PCB.
Nothing fancy about the components, as long the components are original, I will use it.
I think it is been awhile I am not building any electronic project with pre-made PCB like this since I prefer to using point-to-point wiring method. But using PCB like this is saving so much time in the building process.


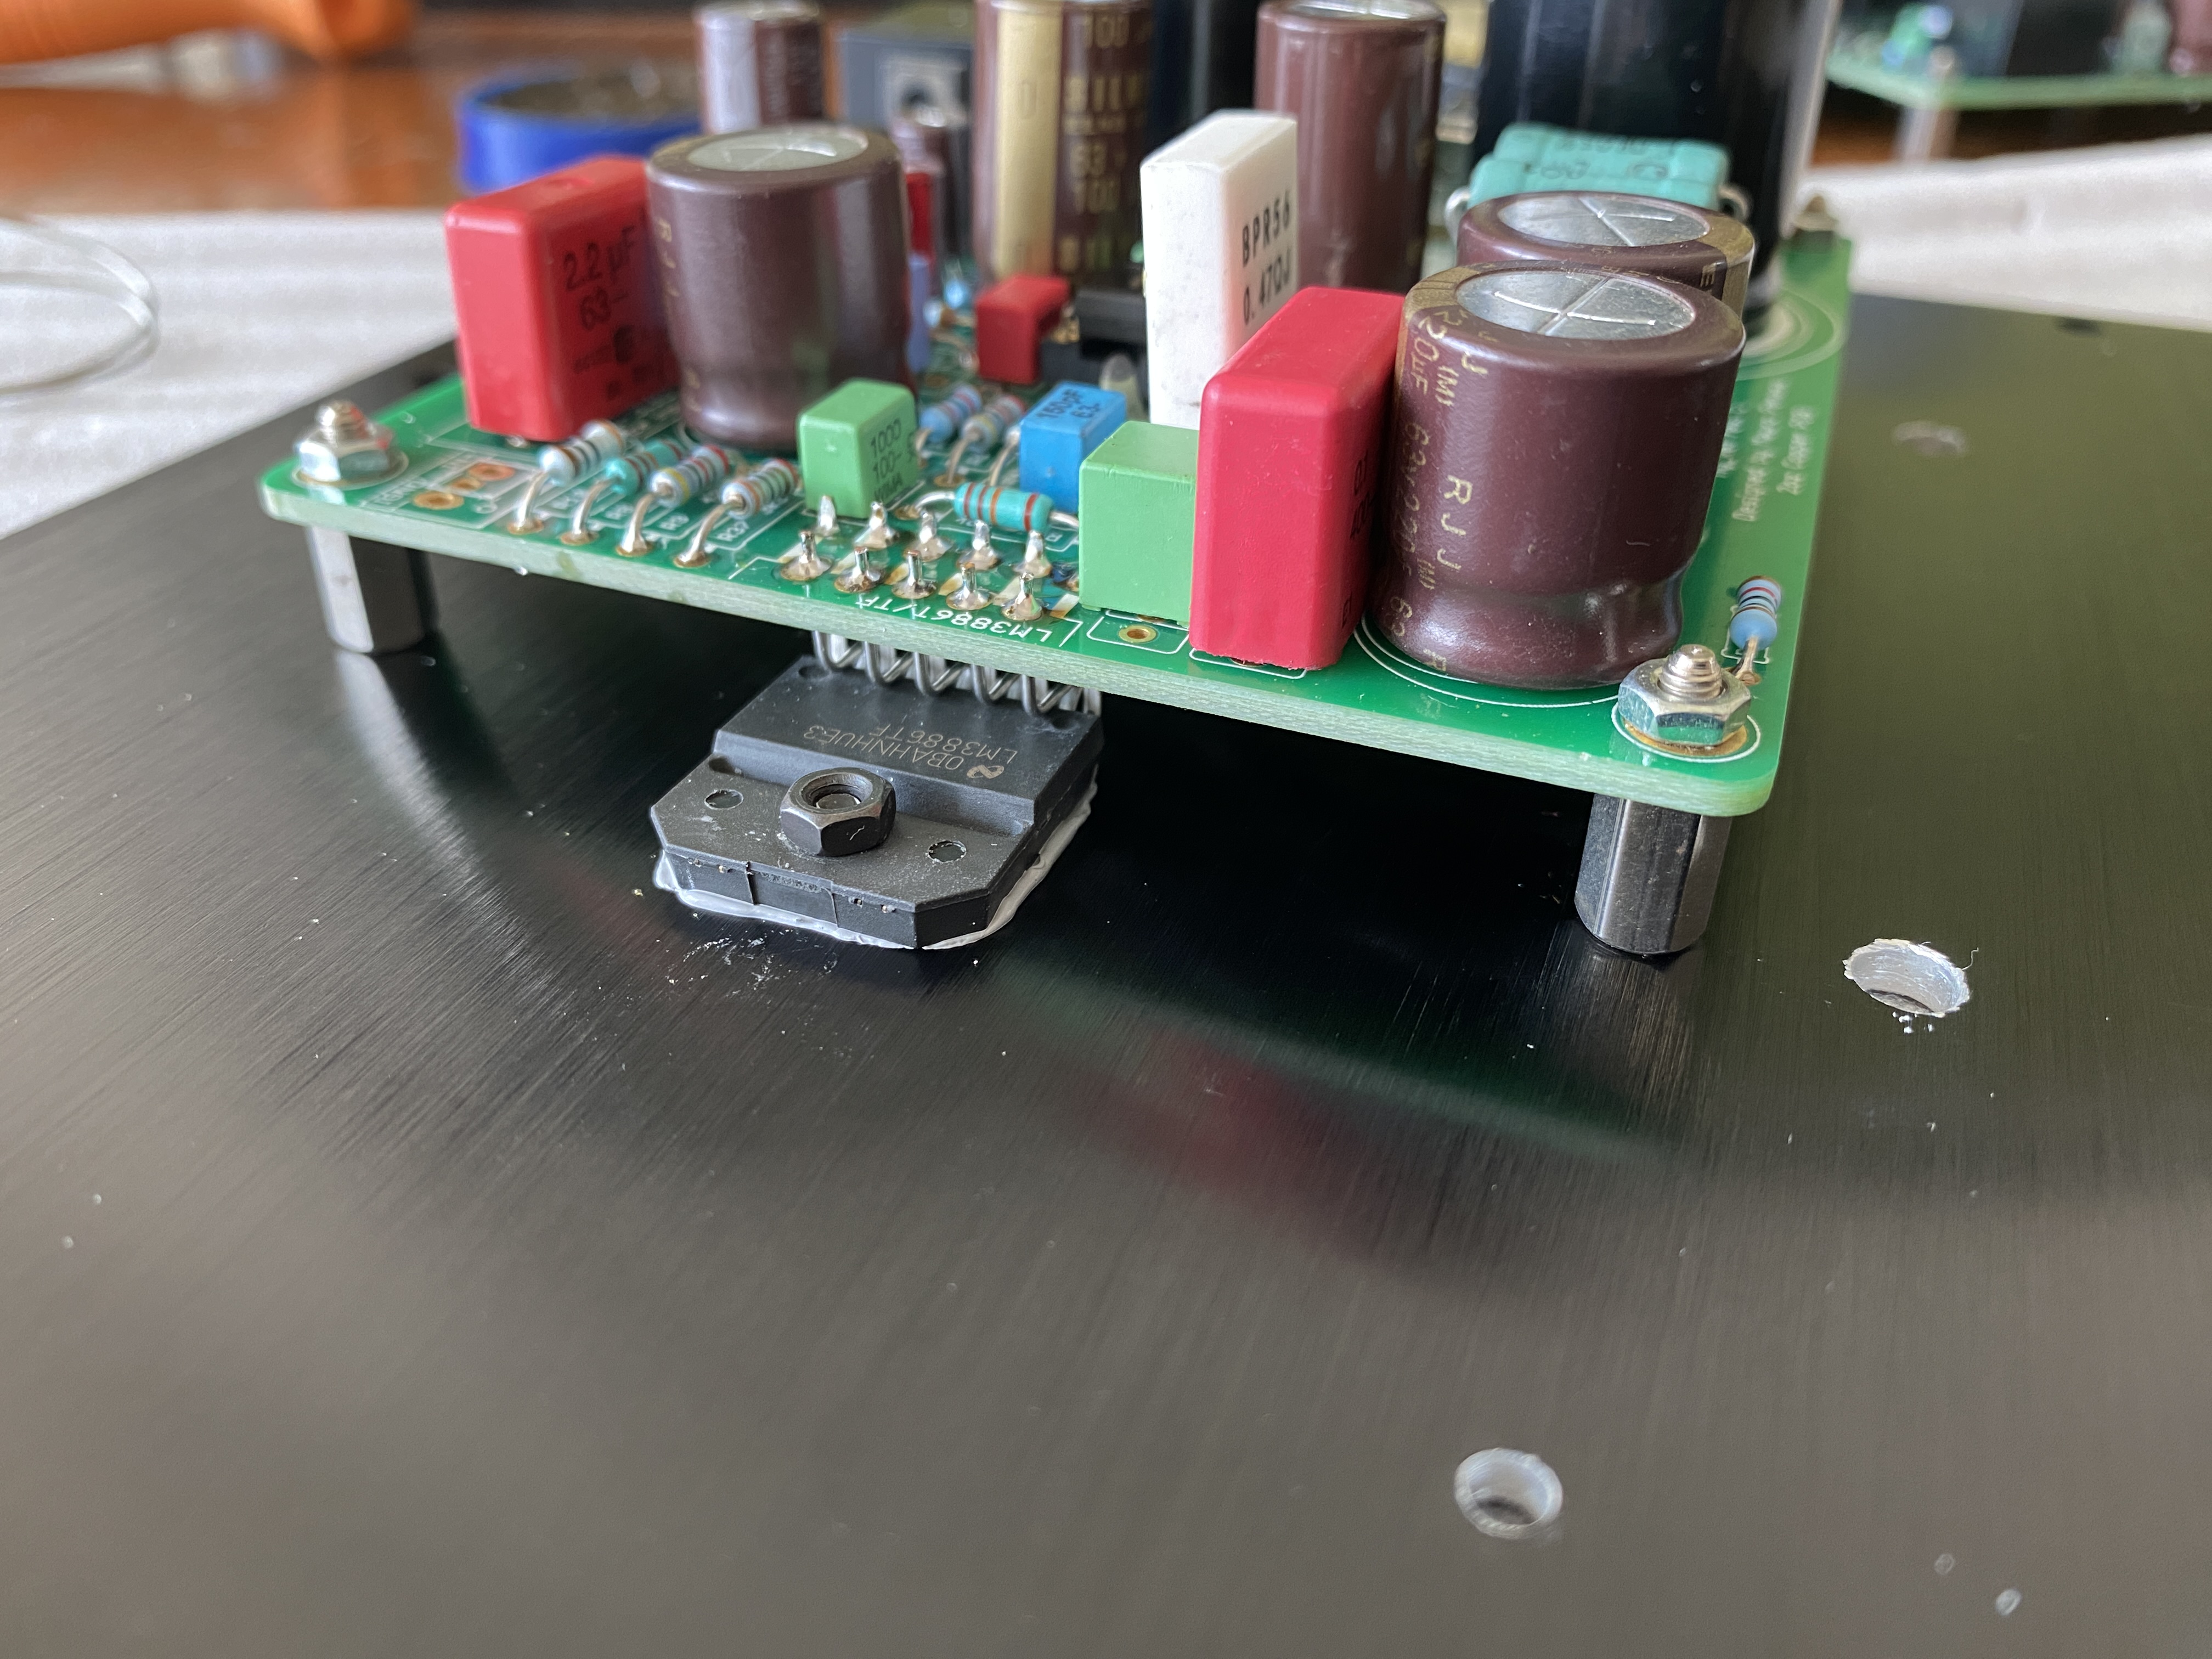
The next challenge is how should I put the LM3886 power heatsink in this small casing amplifier?
Since this amplifier build concept is low profile and small, then using the additional heatsink will not suitable to fit inside it. The solution I made is attaching the LM3886 IC directly to the chassis, act as the heatsink.
The casing is built using thick aluminum, the bottom plate is over 2 mm thick and this will be sufficient for any class AB amplifier like this.


The tricky parts is how to connect the 11 pin LM3886 IC from original vertical layout to horizontal layout? The only way to go is to extend the 1st row pins and straighten the 2nd row pins.


Finished with them, then I can start continue to connect all input output terminals and start to test this amplifier circuit.


Without anything connected to this amplifier except the AC power cord, I check the amplifier circuit to make sure everything works perfectly fine.
Each transformer secondary output are AC 25 volt CT and after the rectifiers and the capacitors, the DC output are 32 volt on each rails to ground.
At the time I start powering this amplifier, the speakers protection circuit will delay the contact for about 2 second then the relay goes engage. This meaning the delay protection circuit are working properly.
The op-amps are not connecting yet and the 1 K ohm 3 watt resistor got slightly warm. This is normal because there are power loss to decrease the DC from 32 volt to 12 volt to feed the op-amps. At the op-amps pin number 4 and 7, there are each 12 voltage reading to ground.
The DC off-set at the speakers output are very low, without any op-amps install I got less than 3 millivolt on each channel.
After this initial test are correct, then I can install the op-amps.
But it is not as it planned.
Because fake op-amps are around and I got a pair of fake LM318 op-amps.
I was shocked with fake LM318 op-amps, it look genuine. But when I install them in this amplifier, the speaker DC out is above 2 volt! It also has loud idle hum and scary thump noise when powering OFF the unit. The other thing is when I accidentally touch the op-amps IC body, the DC output goes even higher so it triggering the DC protection circuit to cut off the speakers connection.
At least this fake op-amps become an example to test the speakers protection circuit is working or not.
.JPG)
All single op-amps can work perfectly fine in this amplifier. You shouldn't stick to the LM318 only just because the original A370 use it. It is not harm to do the op-amps rolling, but let me summarized what kind of op-amps that I have tested in this amplifier.
Signetics NE5534
This NE5534 is very popular and cheap. It has small audible hiss noise when the amplifier is on idle, when no music play art all. The DC offset is around 8 millivolt, still very low enough for the speakers and I have no issue to the sound quality, it is sound good.
National Semiconductor LM318N
The original design use LM318N op-amp. This is a cheap op-amp. Cheaper than NE5524 above. The amplifier with this op-amps is silent when idle. The DC offset is much lower than NE5534, around 3 millivolt. The sound quality for this amplifier in my opinion is better than NE5534.
Burr-brown OPA27
No audible hiss or noise when the amplifier idle same like the LM318 above. The DC offset is the lowest, around 1 millivolt. The sound quality is slightly better than the NE5534. The difference with the LM318 is almost similar but I still prefer using the LM318N.
Burr-brown OPA627AU
This is a holy grail of the op-amps. There still a little audible noise coming from the speakers, like radio frequency noise only when I placed my ear to the tweeter driver. Probably because of the SMD version of my OPA627 using an adapter to suit the original DIP socket. The DC offset is around 5 millivolt. The sound quality improvement is hard to judge. I spent few days listening music with this OPA627 which I think the soundstage is very impressive compare to others. The sound just like a modern amplifier which fuller in all audio frequency band. But somehow it feel compressed.
The the end, I stick to the original design of this amplifier using the LM318N op-amps. This is simply because LM318N sound more warm, more body in the mid-range than any others op-amps I tested in this amplifier.

The amplifier is all finished and I use is as my primary amplifier in my audio system right now.
This Mauro Penasa design amplifier sound is like most UK amplifier, is dynamic, fast and detail with a touch of warm mid-range. This is far from the sound of the original LM3886 Gainclone amplifier which is flat, slow and mellow.
This amplifier is really a good class AB amplifier. The dual mono configuration makes this amplifier superior in the channel separation and stereo imaging but I don't think it will surpass the holy grail of good sounding class A amplifier.
I will not to say which one are better, but this Mauro Penasa design amplifier is become my recommendation for someone who require the more efficient, low cost but good sounding amplifier compares to the heavy and high power consumption of the class A amplifier.
Tribute to Mauro Penasa himself that already passed away few years ago.
Disclaimer: Any statement and photos in this article are not allowed to copy or publish without written permission from the writer. Any injury or loss from following tips in this article is not under writer responsibility.
pl share me the files for pcb and ckt ,,,ftthbsnlcalicut@gmail.com...i am very much interested ..pl help
ReplyDeleteGood Day to you..I am interested to build up your project .kindly share ther Gerber files and Schematics which helps me to construct and understand. Hope you accept my request.Looking for your reply.Thanks in advance.
ReplyDeleteRespected Sir,Kindly send the Gerber file and Schematics to dhakshinaerode@gmail.com.Iooking for your support.
ReplyDeleteHi, you can browse the schematic, they are everywhere. I also bought those PCB.
Delete