
Hybrid Vacuum Tube Headphones Amplifier (Part 4) Foxconn Mini Jack Upgrade

This hybrid vacuum tube headphones amplifier has comes in 3 part. I don't have any planning to make an additional post about this but because it sound so good and beyond my expectation, so why not to make some update posting.

For pass few days, I have listen from this little vacuum tube amplifier and it is a new listening experience for me. In the initial built, I am using cheap 3.5mm socket connector. This is very common to use cheap components for the first trial and upgrade it latter. But with this outstanding result, I can spending more for the better components.

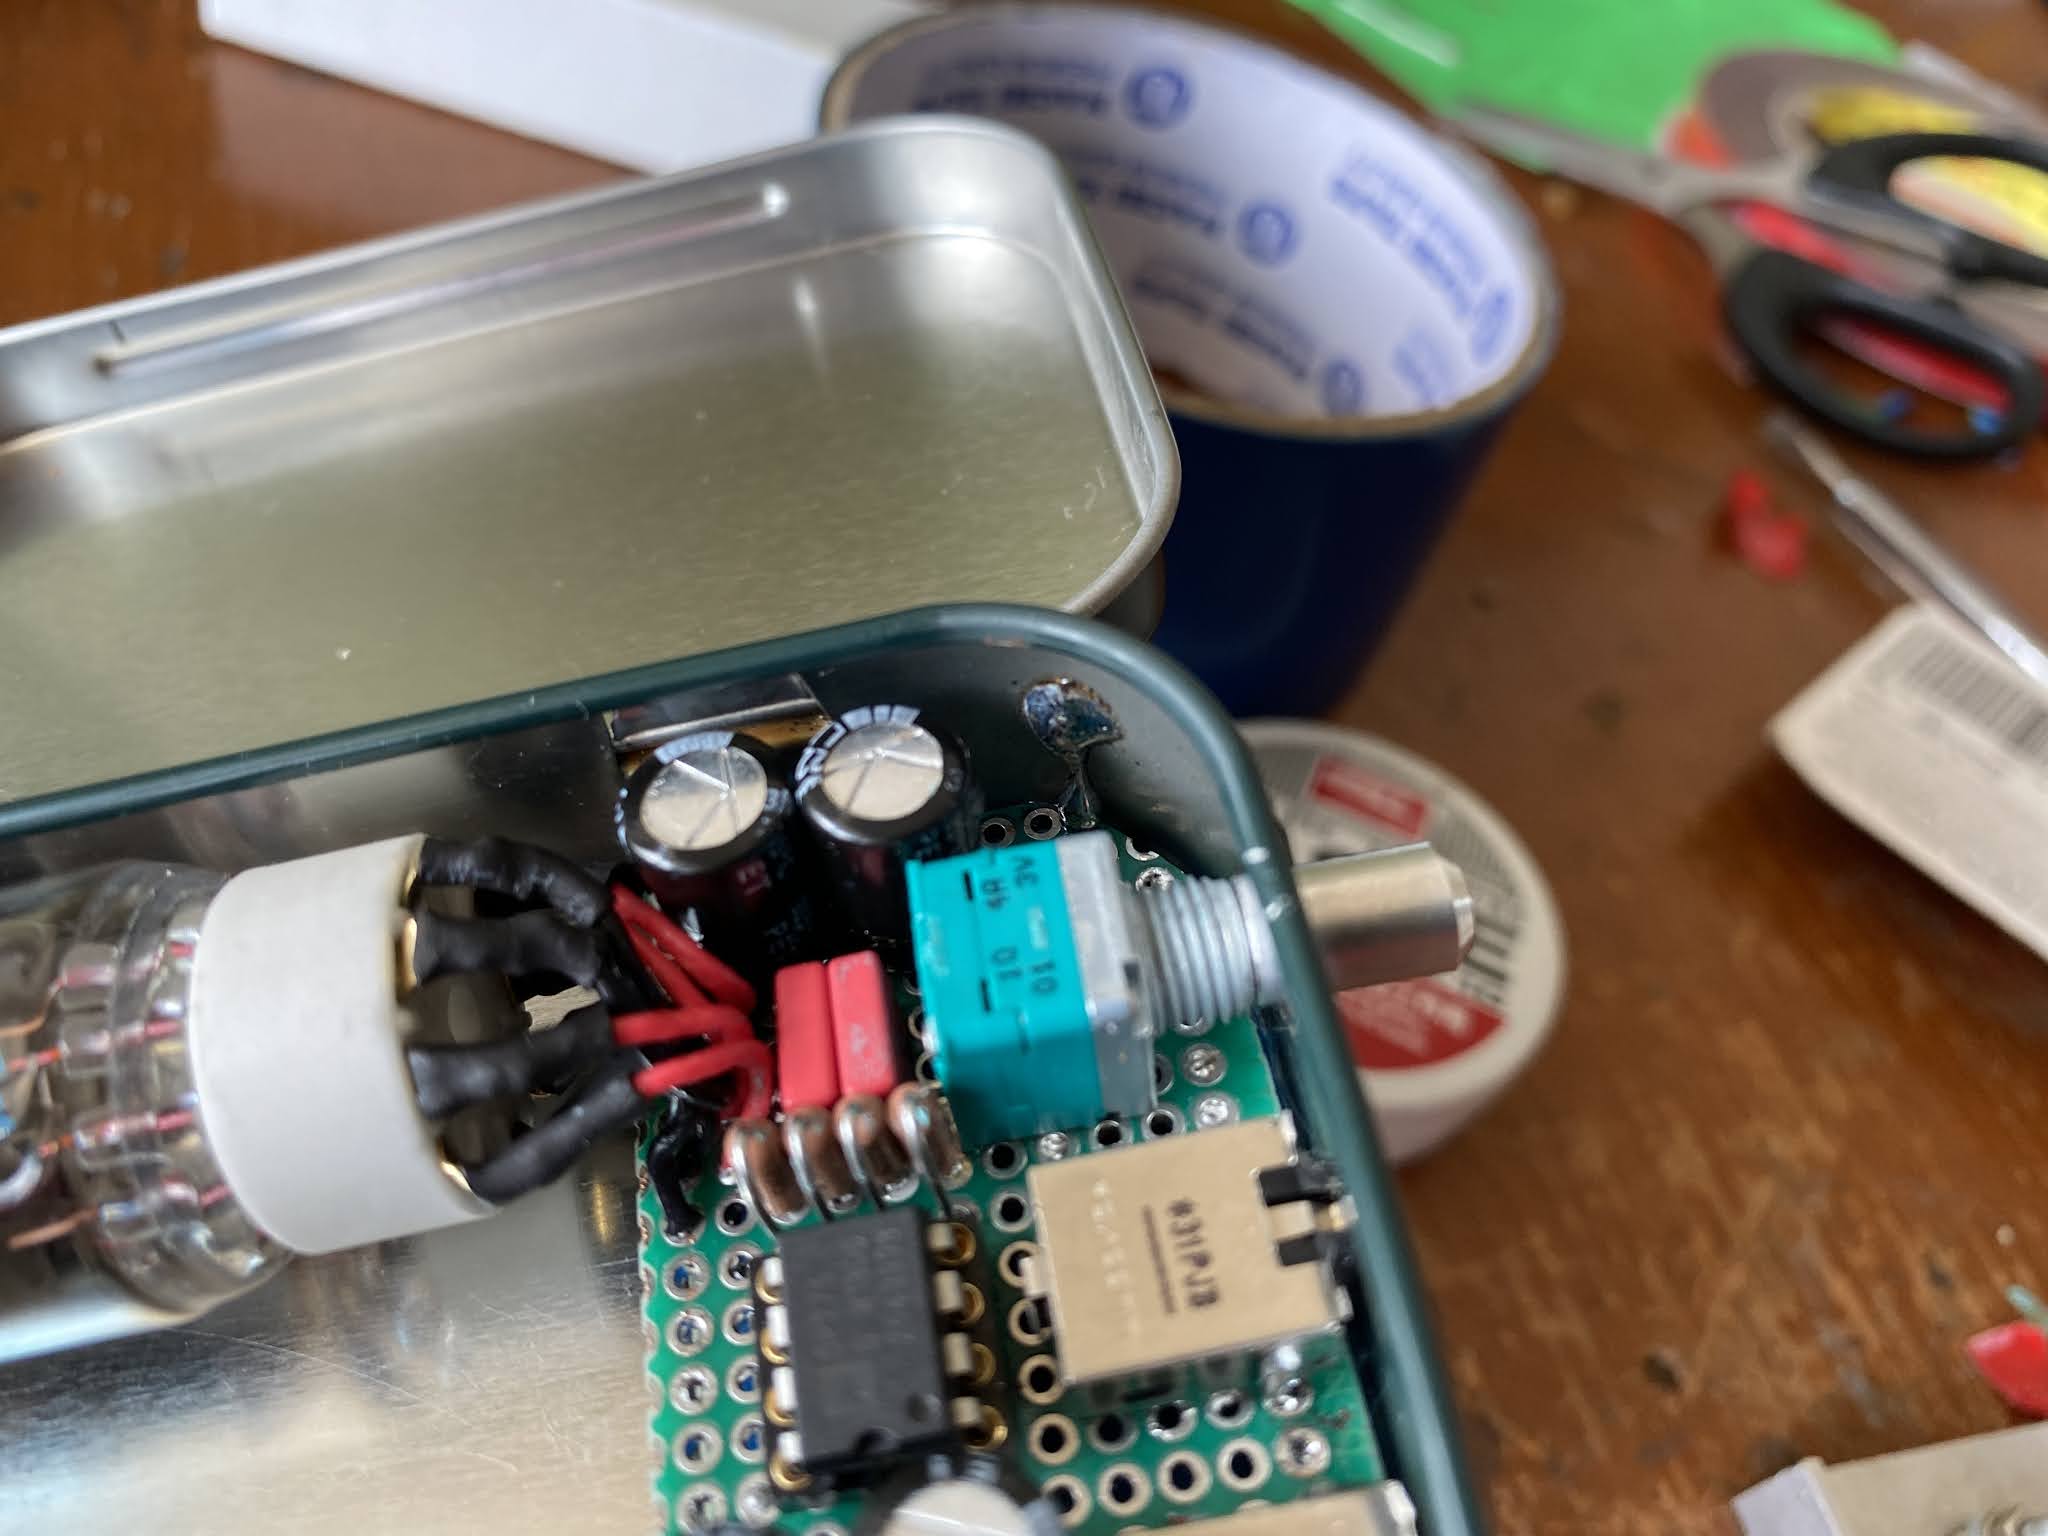
So in this post I will return this amplifier to my working desk and make an upgrade on the 3.5mm socket is now using Foxconn.


The connector I use before is a junk. It cannot make a good contact with the jack and it loose out easily. So I purchase this new connector. The brand is Foxconn and you probably familiar with the name as well. This connector is very well made, high quality and of course heavy duty for this application.

The problem right now is this Foxconn socket is having tiny leads. I should make the extension leads on them for connecting to the PCB.


The next steps is make a fitment on the PCB and the tin casing.


Luckily I don't need to make an adjustment on the tin holes since the diameter are all the same as previous socket.

I also make a PCB holder by using a wire soldered to the chassis tin, so the PCB will stay on it place.


The rest is put all together again, such as DC socket, LM317 and heat-sink, the volume knob and the vacuum tube itself.


Just like any desktop amplifier, I attach rubber feet on the bottom of it.


With all of 3 part of this hybrid vacuum tube amplifier built, here are the bill of materials I spent.

1. Universal board 6x8cm        1 pcs    each $0,50       $0,50

2. Dale RN55 resistors             7 pcs    each $0,34        $2,41

3. Rubycon ZLH capacitors     6 pcs    each $0,21        $1,24

4. Alps green potentiometer     1 pcs    each $5,17        $5,17

5. Brouns multiturn VR            1 pcs    each $0,83        $0,83

6. Wima MKS-2 100n              2 pcs    each $0,49        $0,97

7. Nextron IC socket                1 pcs    each $0,34        $0,34

8. TI OP275 dual op-amp        1 pcs    each $2,41        $2,41

9. Foxconn 3.5mm socket        2 pcs    each $1,72        $3,45

10. Tube socket 9 pin               1 pcs    each $1,89        $1,89

11. NOS 6N23P              1 pcs    each $8,62        $8,62

12. DC socket                          1 pcs    each $0,14        $0,14

13. TI LM317T                        1 pcs    each $0,83        $0,83

14. TO-220 heat-sink               1 pcs    each $0,10        $0,10

15. M&S candy tin                   1 pcs    each $3,45        $3,45 bonus candy

16. Teflon jacket cables            1 meter                         $0,83

17. 3M rubber feet                    1 pack  each $1,79       $1,79

18. Volume knob                       1 pcs    each $0,20       $0,20

Total material cost, excluding working tools US$35,17 quite cheap isn't it.

So at the end, it is a great pocket size vacuum tube amplifier project. It sound really good and listening music from it while see the vacuum tube glowing is the best experience for every audiophile.

Disclaimer: Any statement and photos in this article are not allowed to copy or publish without written permission from the writer. Any injury or loss from following tips in this article is not under writer responsibility.

Comments

Popular posts from this blog

OPA1622 Vs. OPA627 High Performance Op-amps Comparison

This op-amps comparison topic is actually boring, but at the same time, many of us still curious about what others think about it. The reason is simply because of the op-amps variation are hundreds and they are depends by the implementation. The op-amps are considerably cheap and an interchangeable electronic components but they are not built for the same function. So in this discussion, I will focus on the modern Vs. vintage high performance op-amps in the simple non-inverting pre-amplifier gain stage.

Vintage Multibit R2R DAC Tier List

At the very beginning of this year, I committed to explore the best multi-bit R2R DAC. This is simply because I have plenty of the resources (from broken old unit CD player of course) and ability to build them up. If you think this kind a recycle from old un-used unit to become something useful, than I should stated myself giving contribute for greener world:) After all DAC that I built in this year, I think it is better for me to list them up again in one single page like this. Then I will rank them up in a simple tier list. The reason for this, so you all know what my opinion about of those vintage multibit R2R DAC especially in the sound quality.

TDA1543 DAC Review In 2021

It is a fine day and as usual I am reading and searching online contents related to almost anything I like. During my search, I stop to the few online forum discuss about a simple DAC using TDA1543 DAC IC. The discussion about this DAC was about 3 years ago, and the latest was about a year ago. Quite new and overall discussion about this DAC sound quality mostly are positive. It is interesting topic anyway especially I was built this TDA1543 DAC long time ago in 2016. At that time, I combine this DAC with Tripath amplifier  here  and  here  before it sold in 2019. That is also my first DIY DAC and I am quite enjoyed this DAC so much, at that time. The background story about this, previously I was using Sony Playstation SCPH-1002 as my reference CD Player. The reason I moved to this TDA1543 DAC is because the CD optic inside the Playstation is wear out and I cannot find the replacement for it. I pretty remember the sound quality of this TDA1543 DAC is quite comparable...